Campaigns
Campaigns allow you to send highly targeted messages to segment(s) of your customers, collect and parse their responses, run A/B tests on your copy, and much more! It also allows your engineers to code a campaign once and non-engineers to continuously iterate on copy to improve performance without requiring more development work.
The Campaigns feature can be found in the Main Menu.
Campaigns Modal
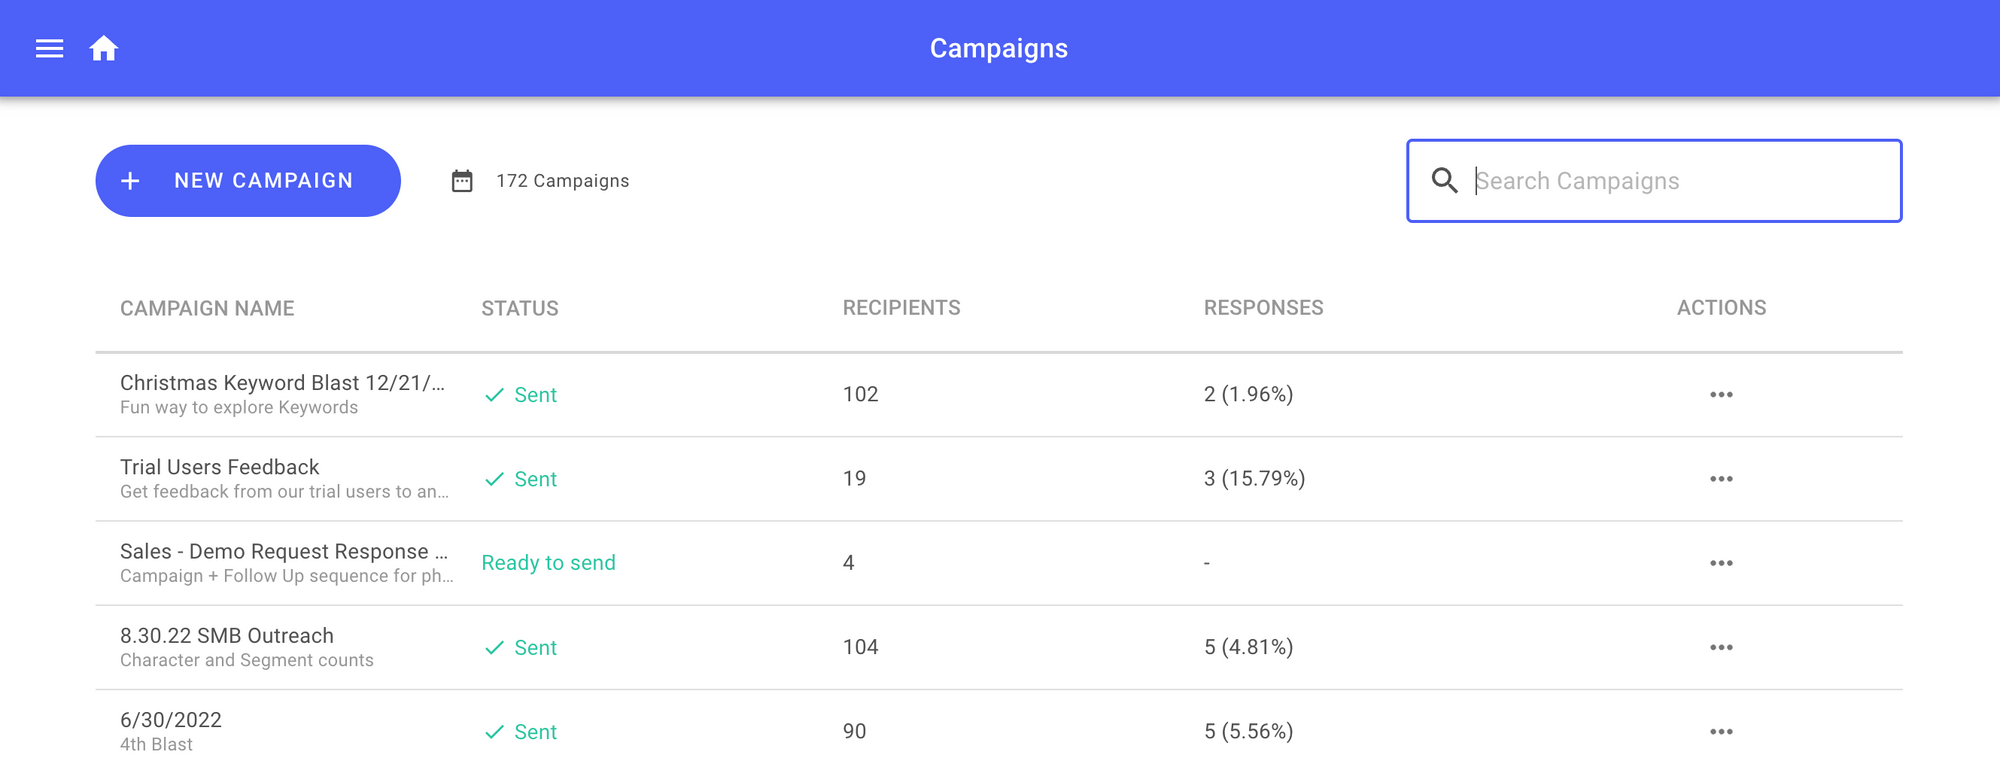
In the Campaigns modal, you'll see all of the campaigns you or your team has created. This includes drafts, sent and scheduled campaigns, and active campaigns that have not been sent yet. Here, you can:
- Create a new campaign
- Edit a campaign
- View results from a sent campaign
- Send a previous campaign to more customers
- Delete a campaign
For sent campaigns, you'll see the number of customers you've sent the campaign to and the number of responses.
Select New Campaign to begin.
Create Campaign
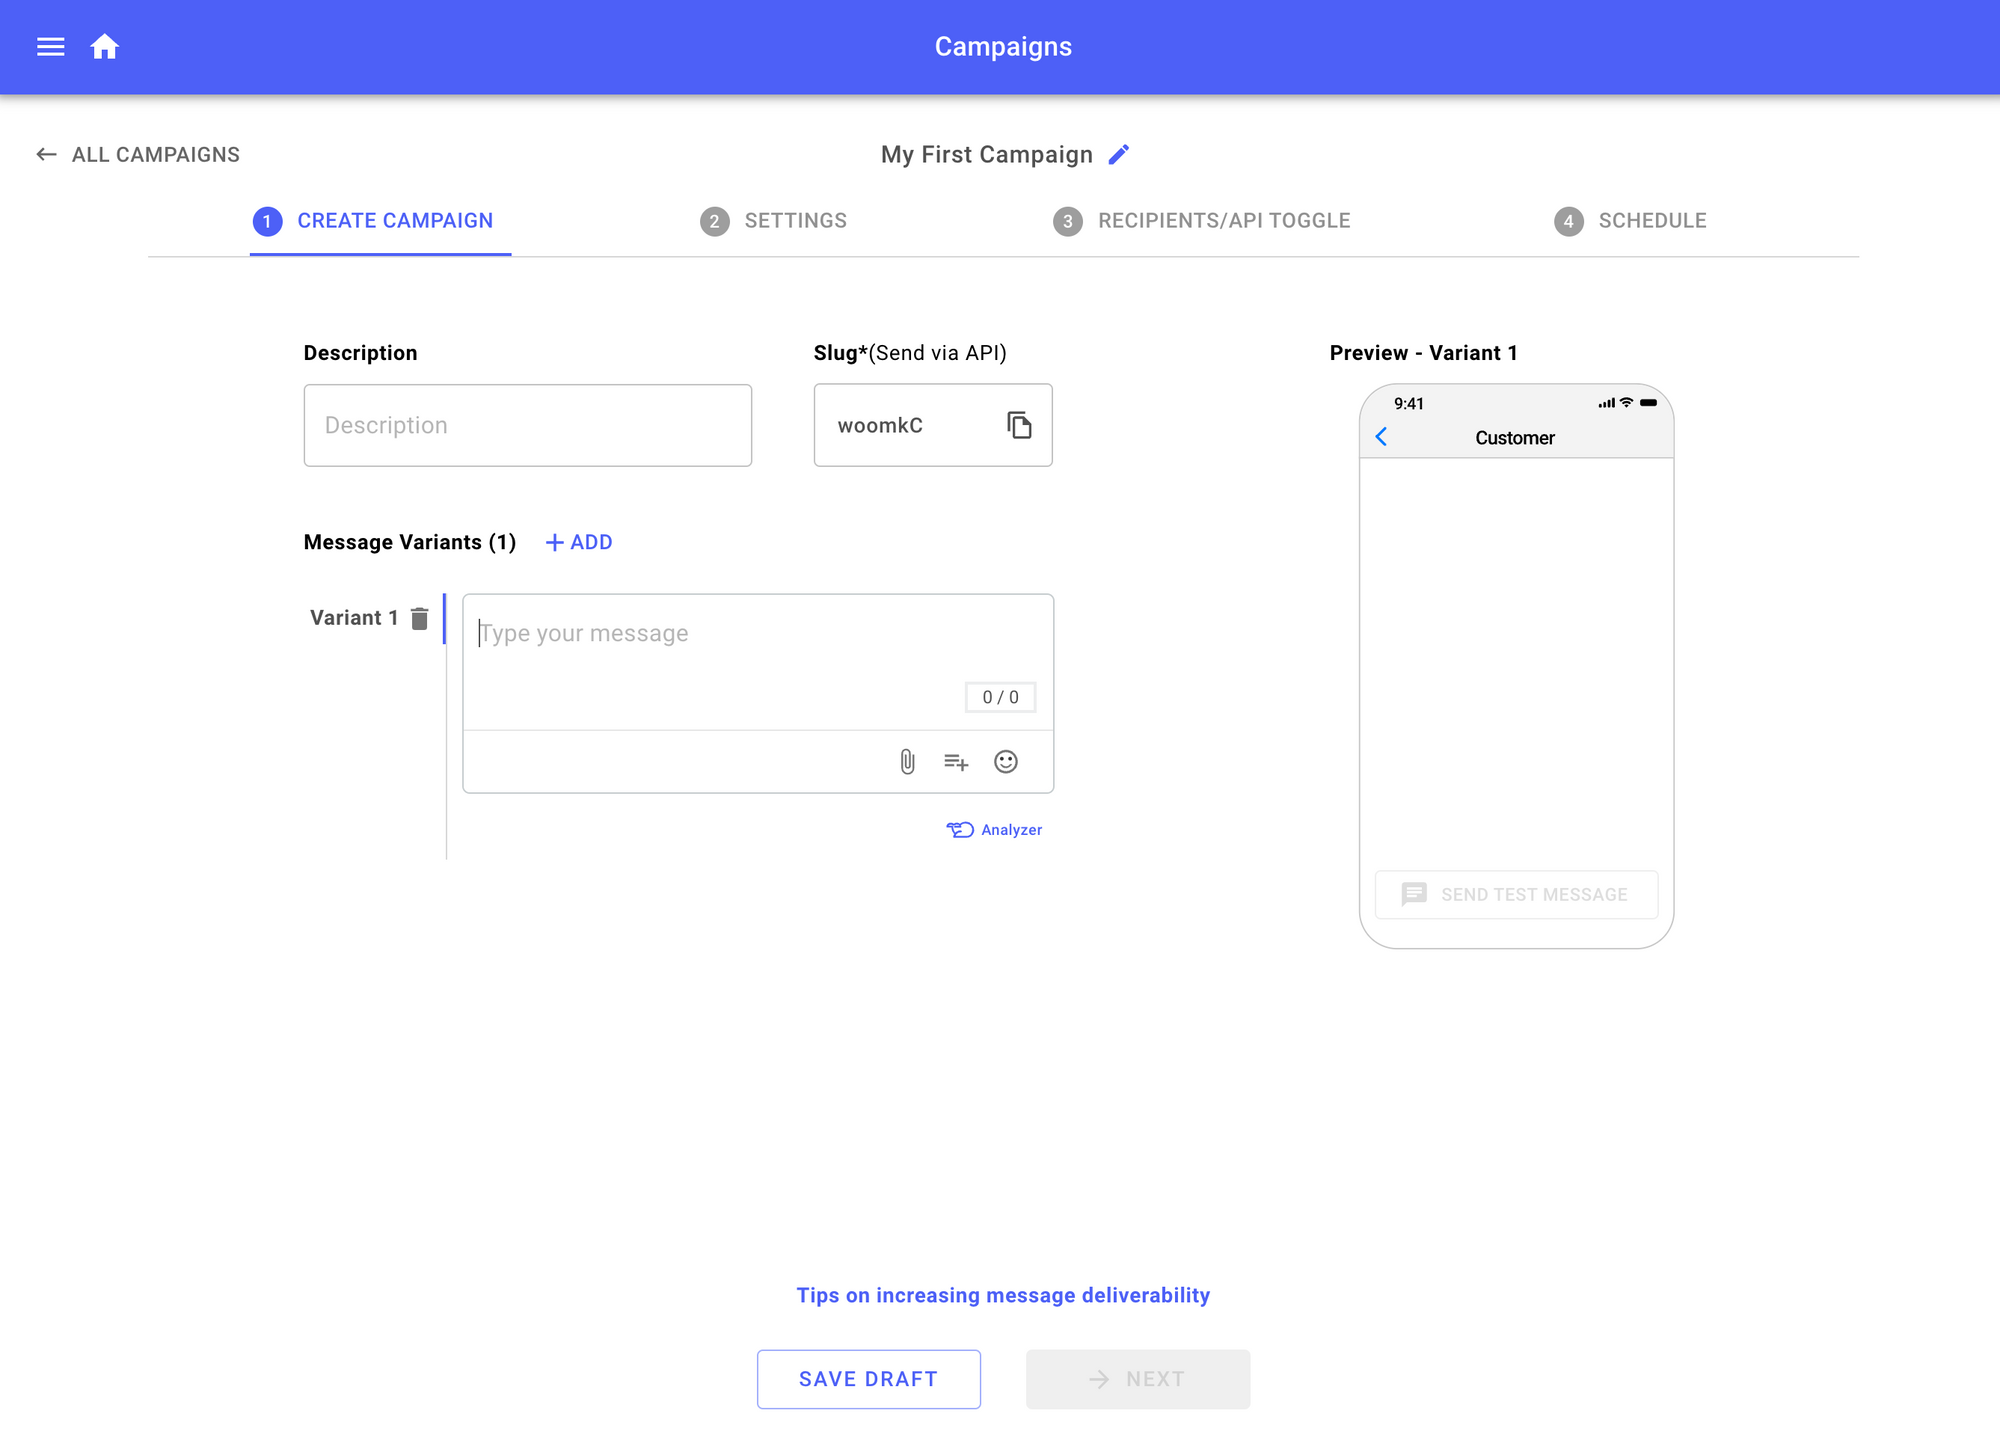
This is where you define your campaign, such as adding a name, description, and the initial copy you want to use.
-
In the Name field, enter a name that will help you easily identify the campaign. This field is internal and only admins see it.
-
The Description field is optional and is also internal and only admins can see it.
-
(Optional) The Slug can be used when sending campaigns via API. Click on the copy icon to copy the slug URL to give to your engineer.
-
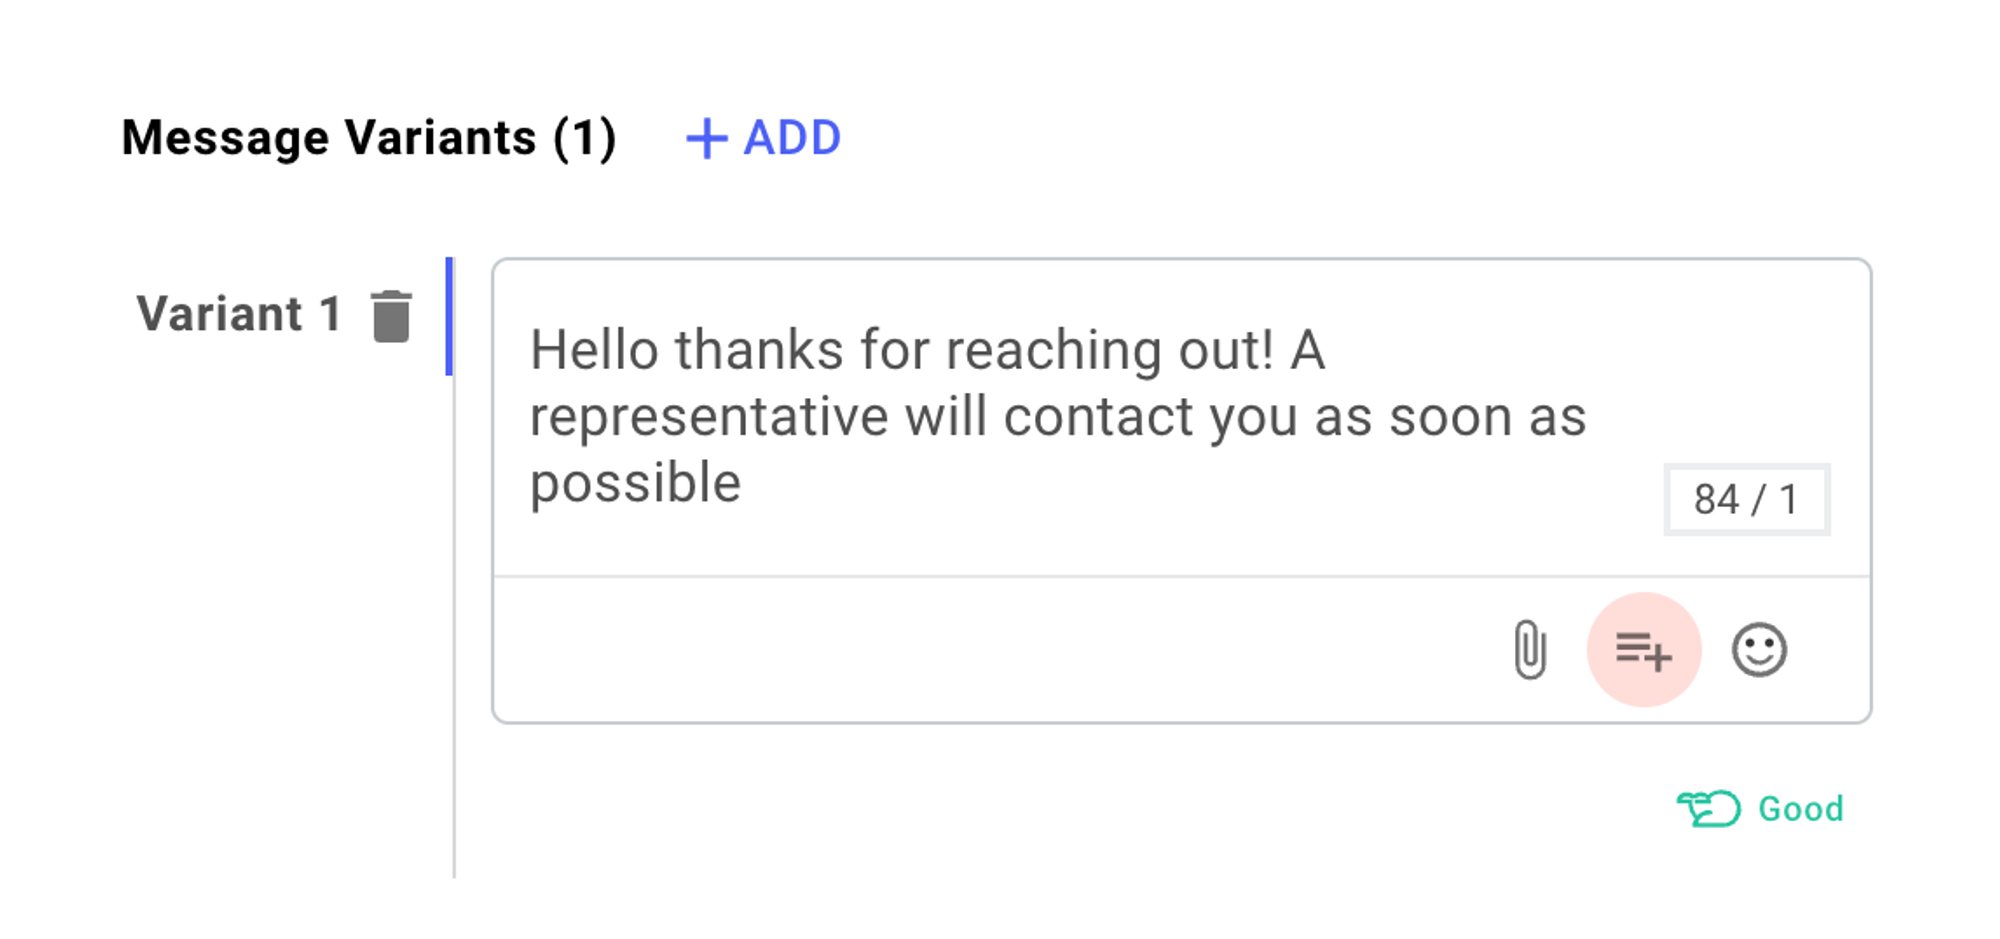
You can enter multiple message variants. This is to help increase message deliverability (see below) and is great for A/B testing as well.
-
Click on Next or the next tab to move onto the next section.
Tips on how to increase message deliverability
-
Make sure your two variants are sufficiently different from each other.
-
Try to personalize messages to the customer. Include properties like customer first name by including:
{{first_name}} -
Be as colloquial as possible, the more machine-like you sound the lower the response rates!
-
Try to mass message customers after they’ve messaged you, indicating they like text as a channel.
-
When you have to reach out first, introduce yourself as a person (“Hey, this is Matthew from Sonar” vs “Hey this is Sonar”)
Check
Preview your message and send yourself or others a test message before sending out your campaign. Click on Send Test Message and then enter the mobile phone number. If you click on Preview, you'll see an example of what your message looks like on the right-hand side of the phone image.

Sonar SMS Analyzer
The SMS Analyzer is a handy tool to help the author of a campaign write message copy that is optimized for deliverability* and customer engagement**.
The first iteration of the Sonar SMS Analyzer uses keyword detection to identify when your campaign variant contains keywords or phrases that are known to trigger carrier SPAM filters. The Sonar SMS Analyzer analyzes your campaign variants as you type them and then provides a ‘Good’ or ‘Warning’ rating that you can click on for more detail.
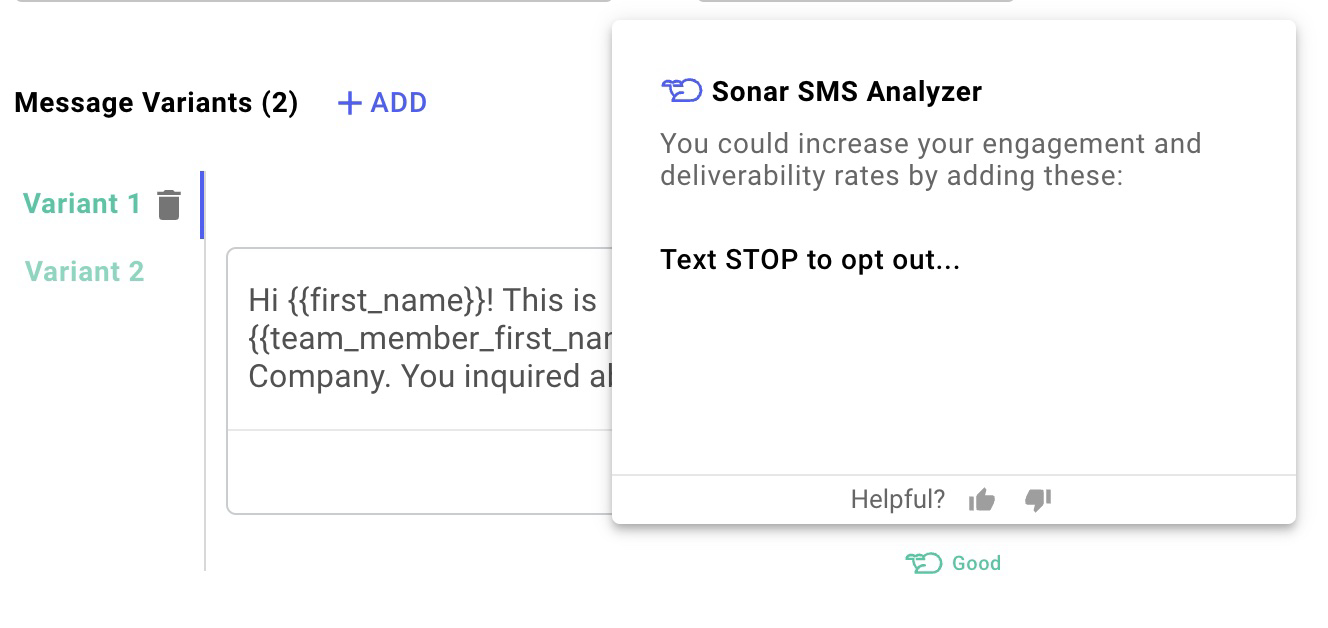
This is an example of a campaign variant that avoids common SPAM keywords.
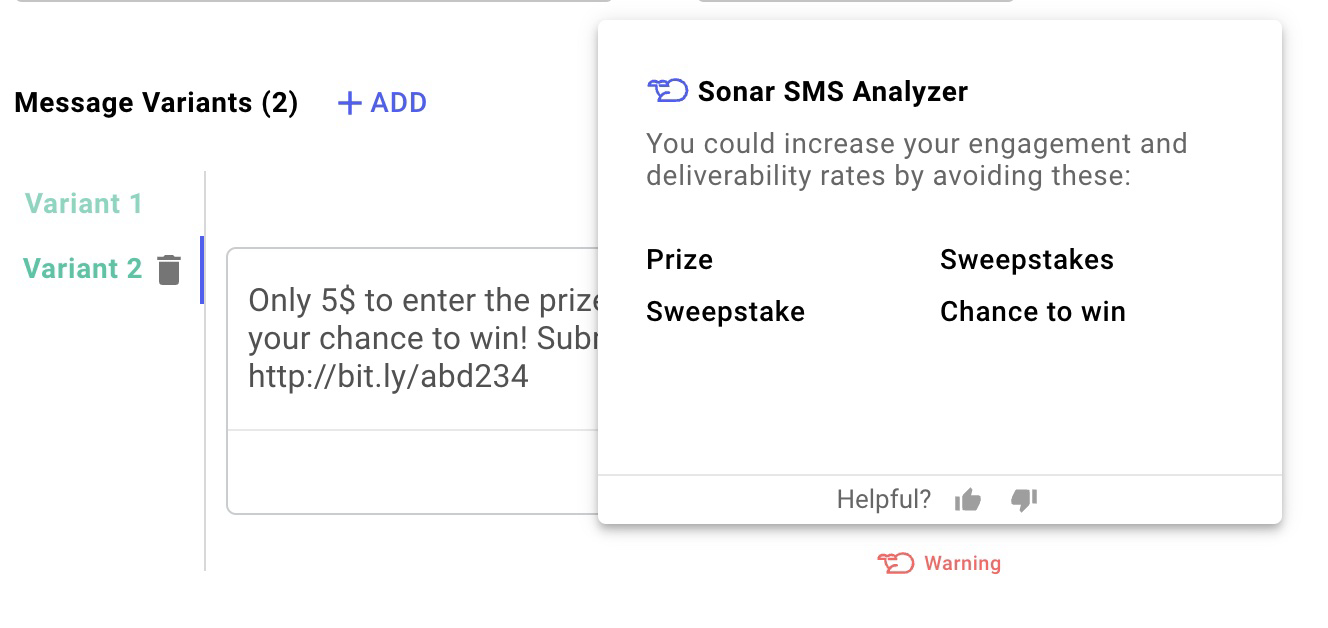
This example shows a Sonar SMS Analyzer warning due to message content.
Read SMS Best Practices for tips on writing messages that provide a great customer experience and reduce risk of being filtered by mobile carriers.
- Deliverability refers to the likelihood that a message will be delivered to the destination mobile phone or blocked by mobile carriers as suspected SPAM or for some other reason. See Deliverability Error Codes for some additional reasons a message could fail to deliver.
- * Customer engagement refers to any action that a customer (i.e. recipient of a message) might take as a result of receiving a message. Actions include responding to the message, clicking a link in the message, or some other action such as placing a call to your business.
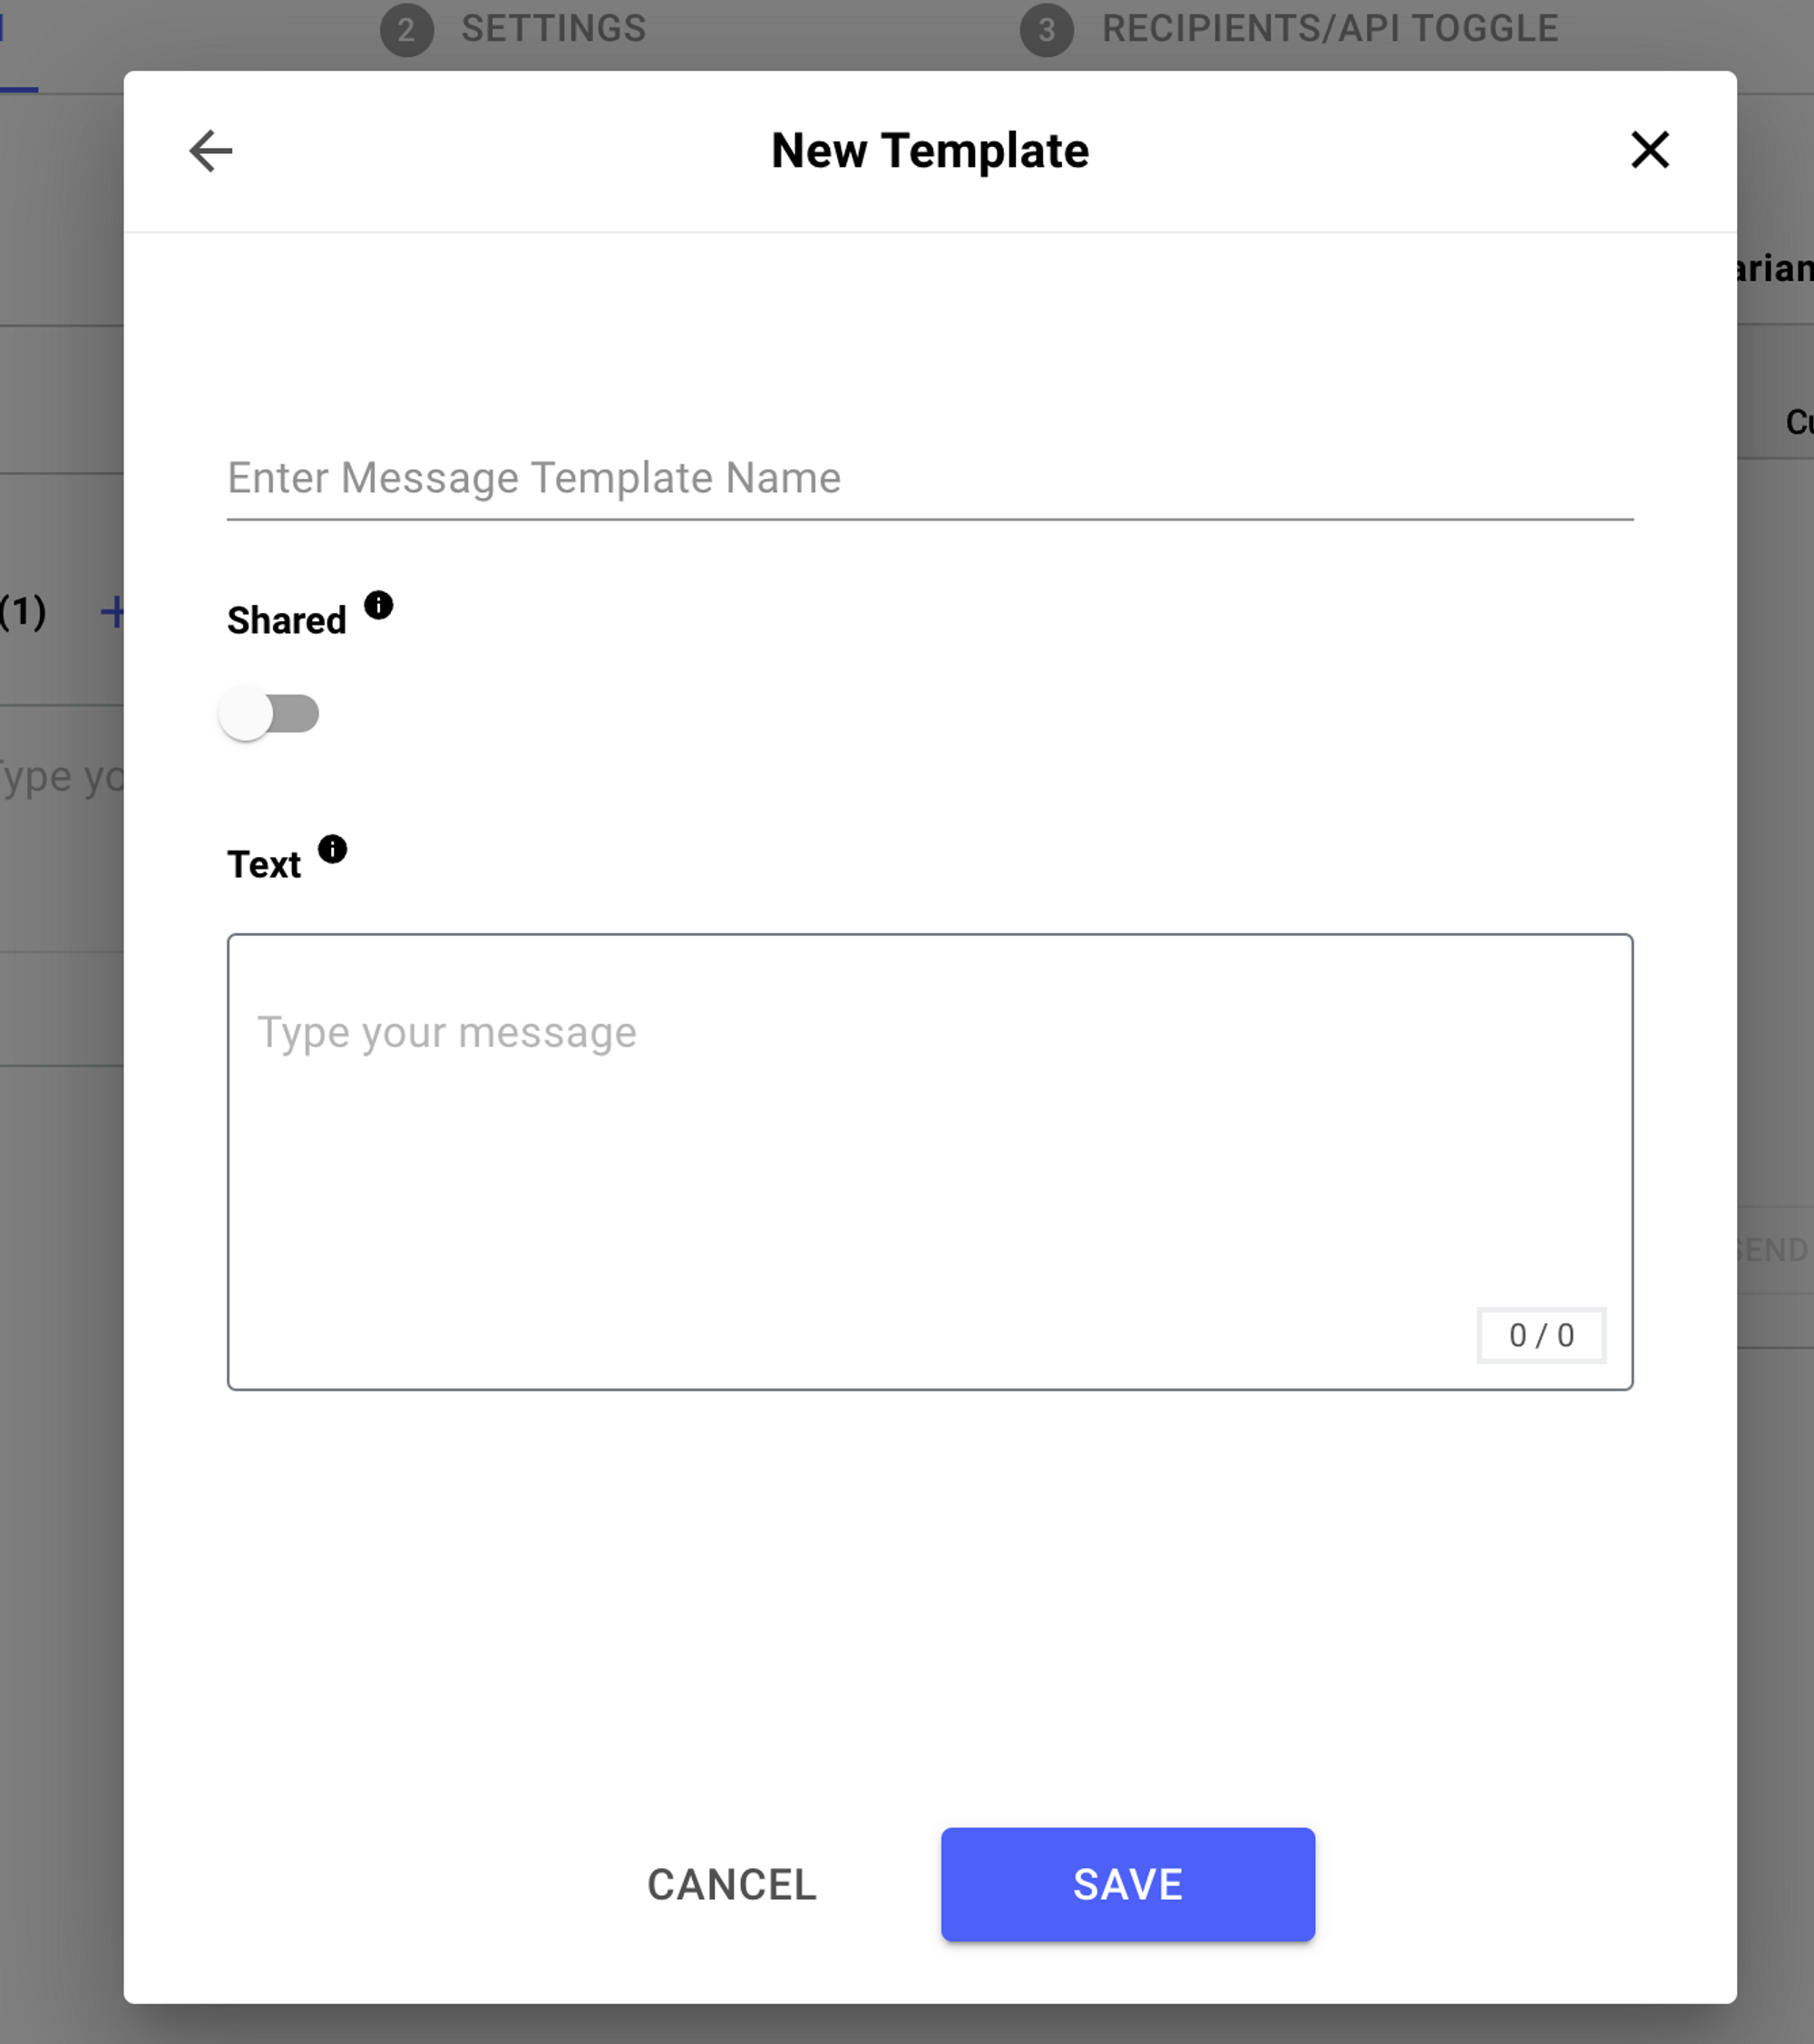
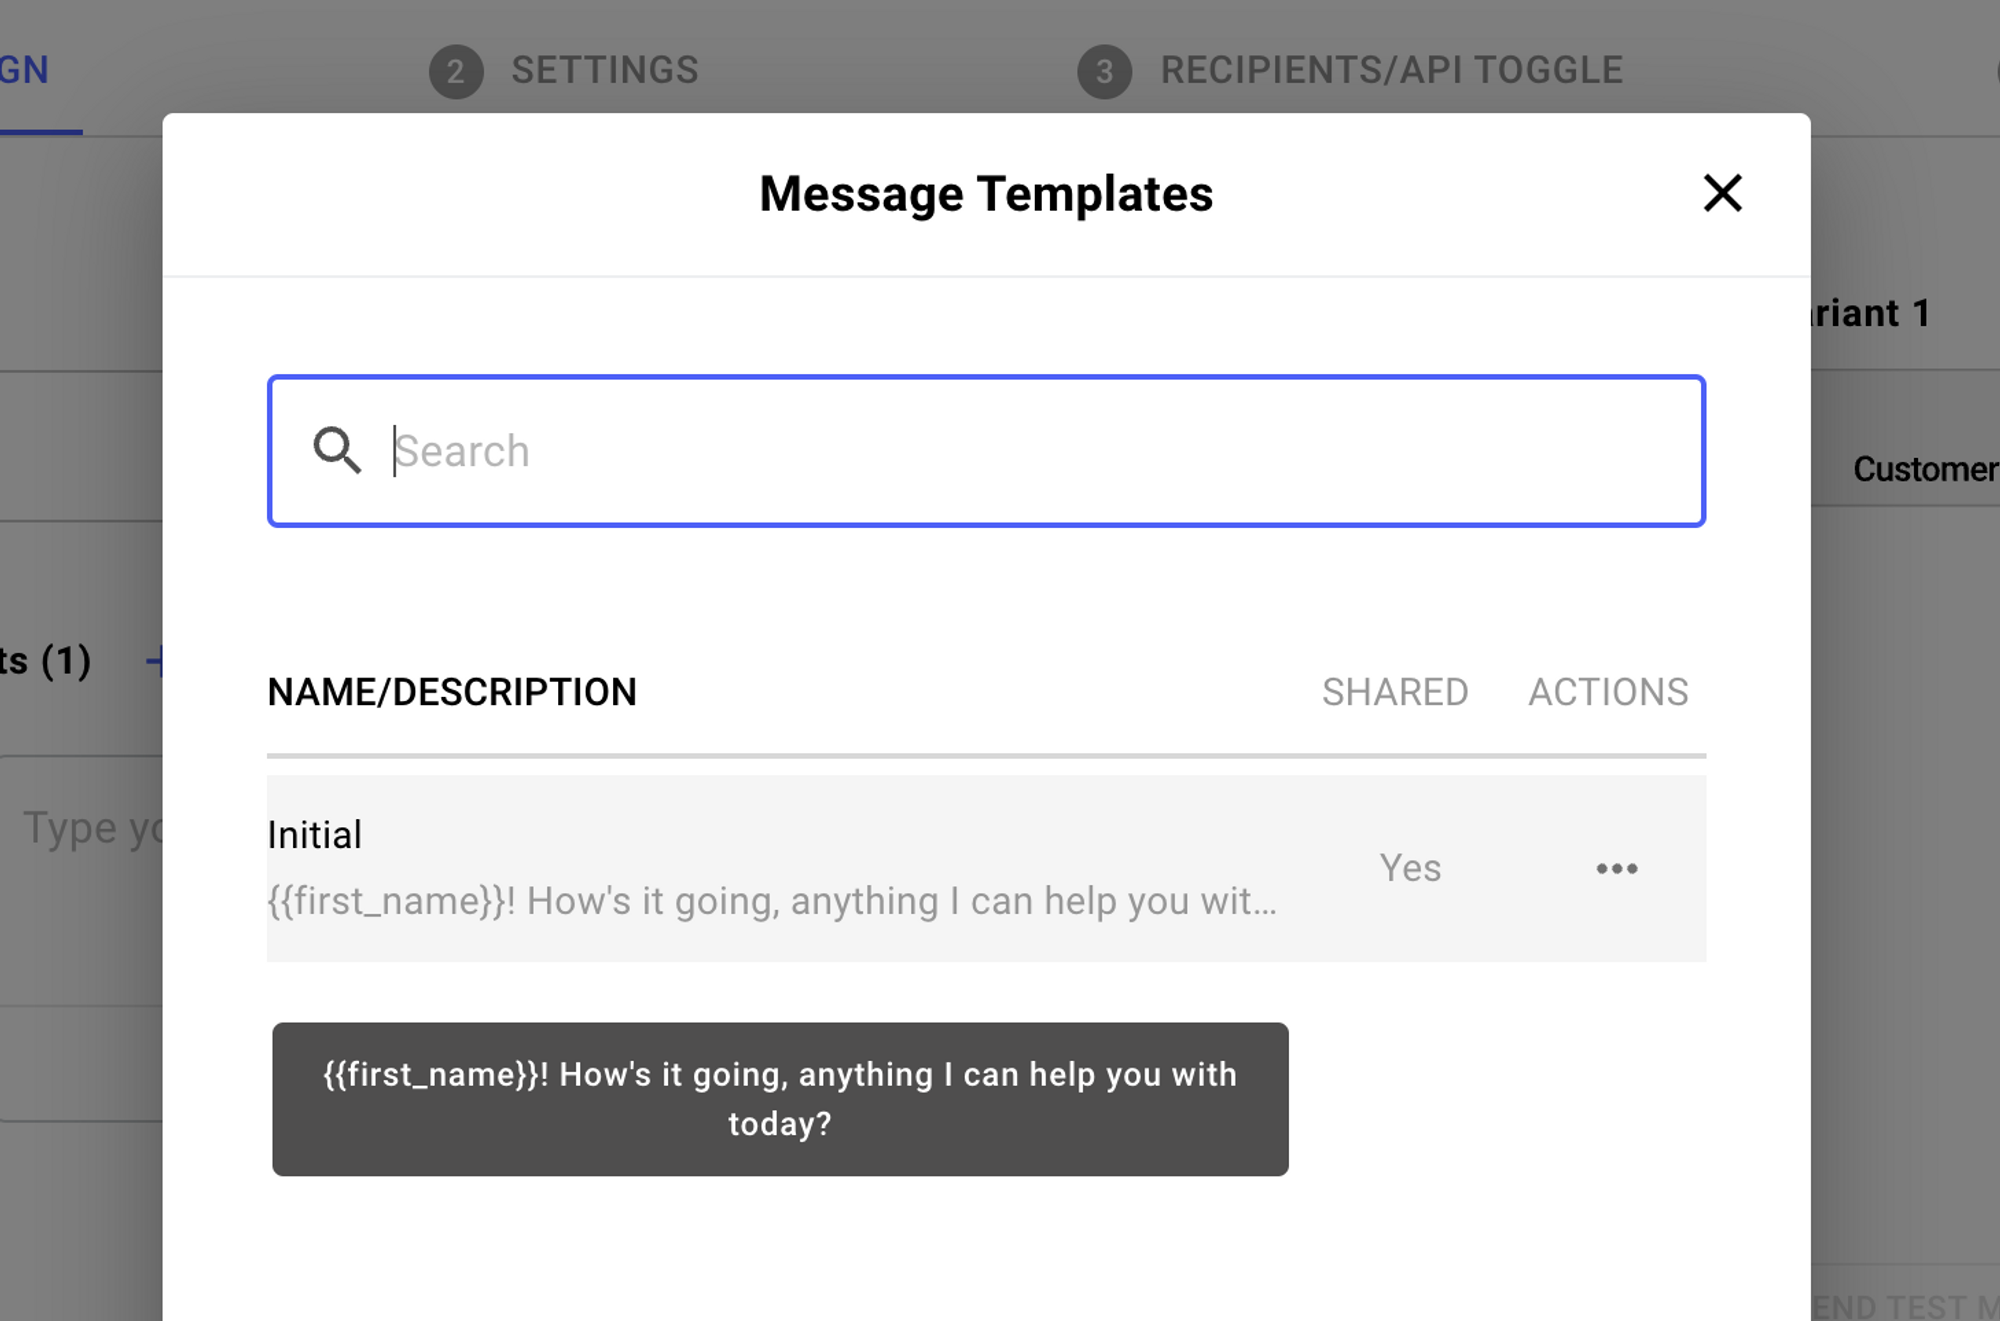
Create, Save & Share message templates:
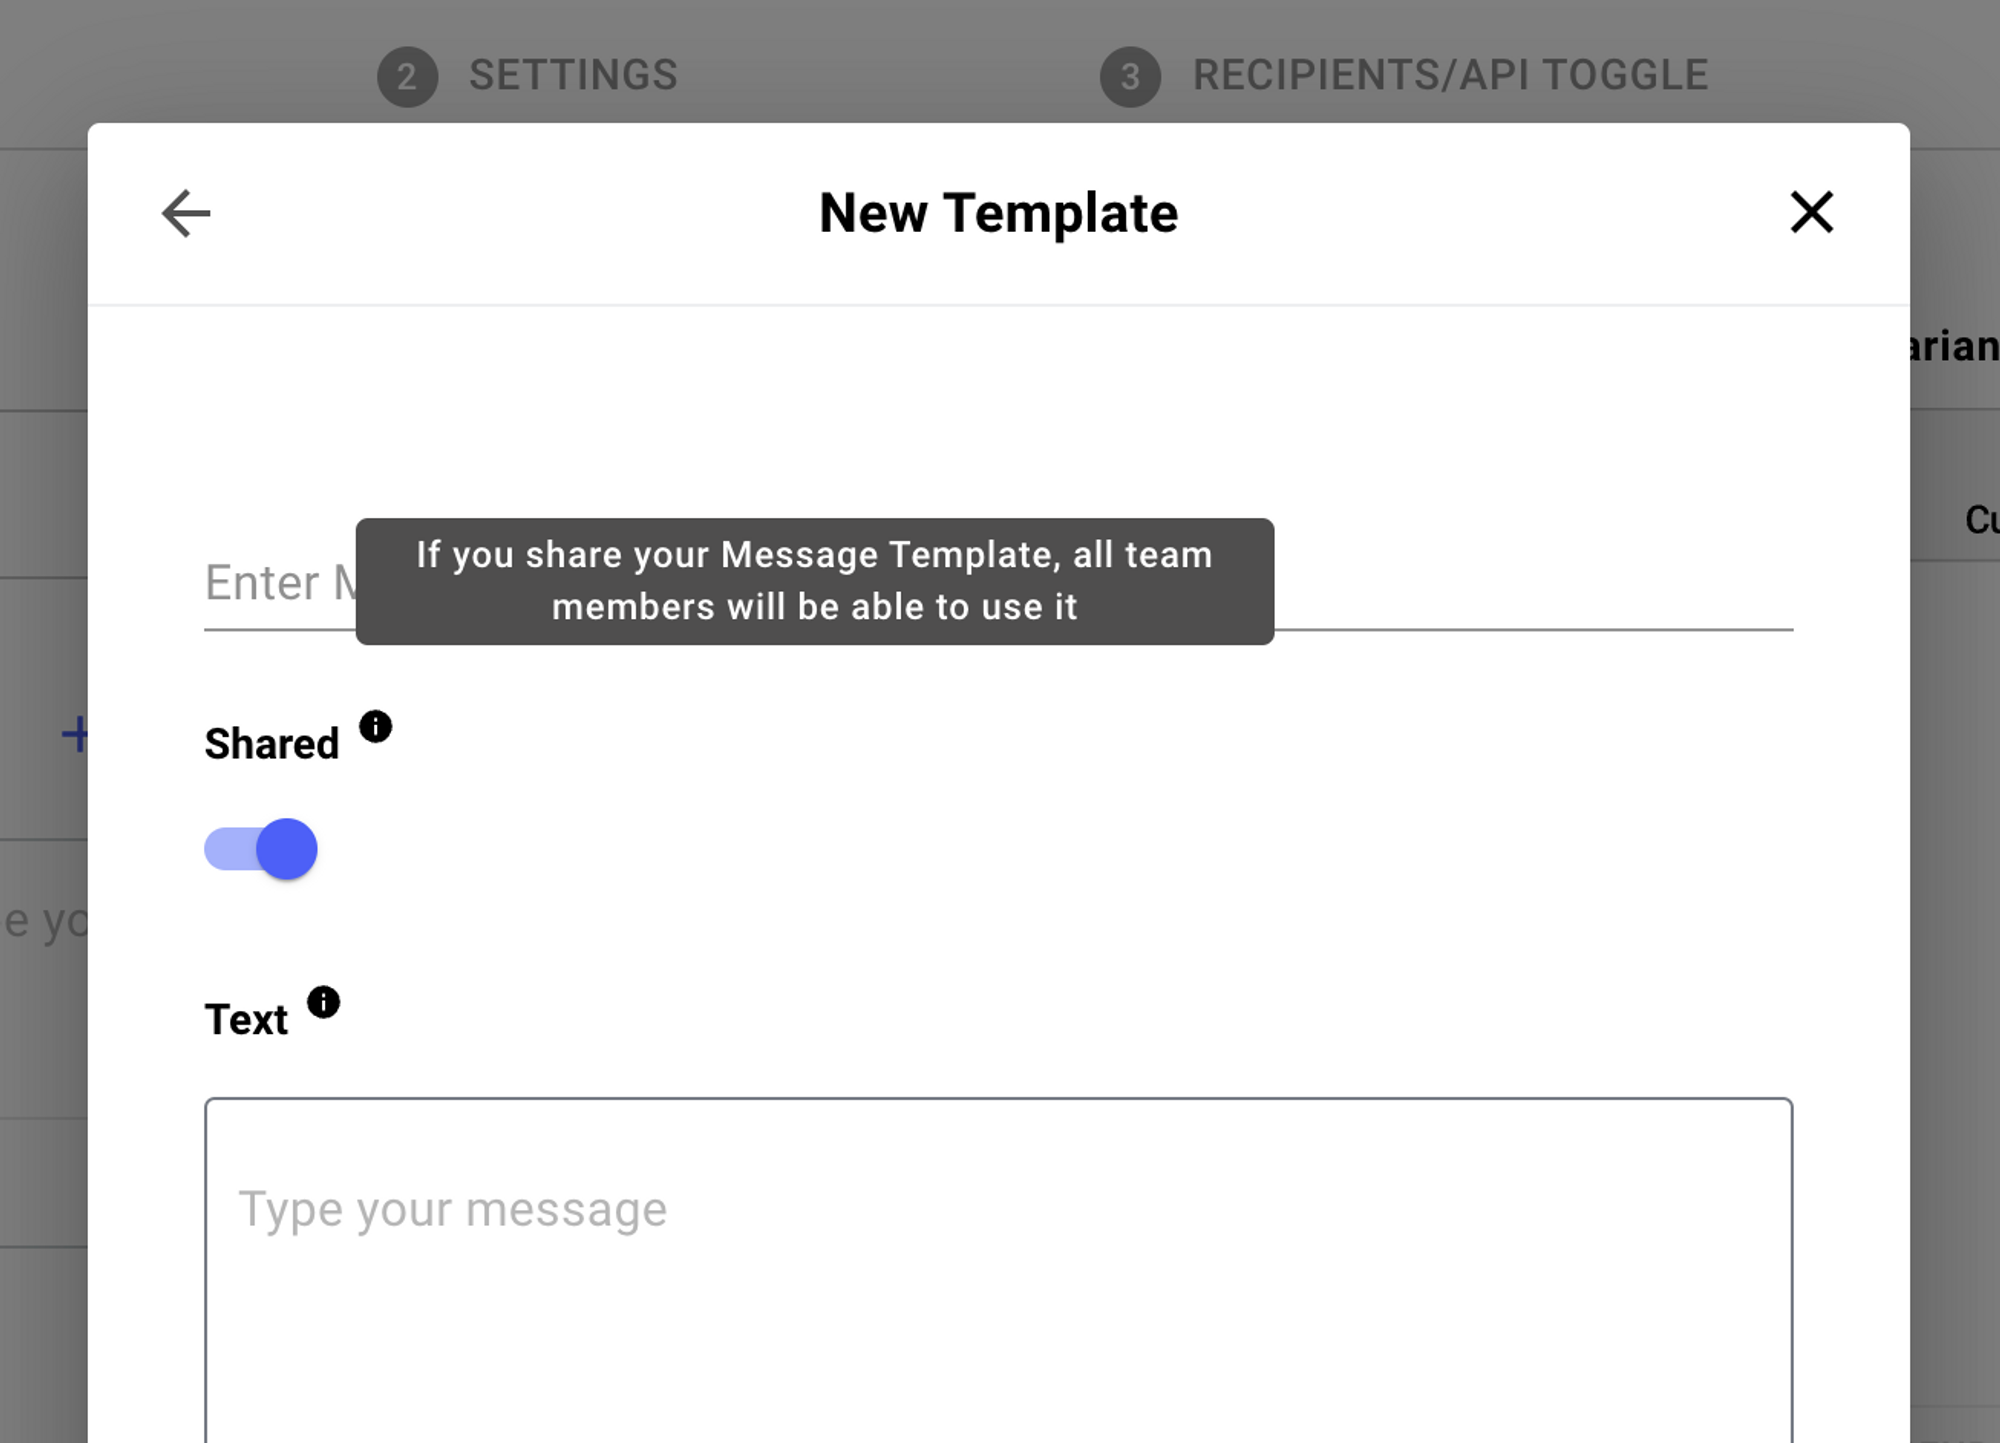
Create as many message templates for your campaigns as you need and decide which templates are shared across your team in Sonar.
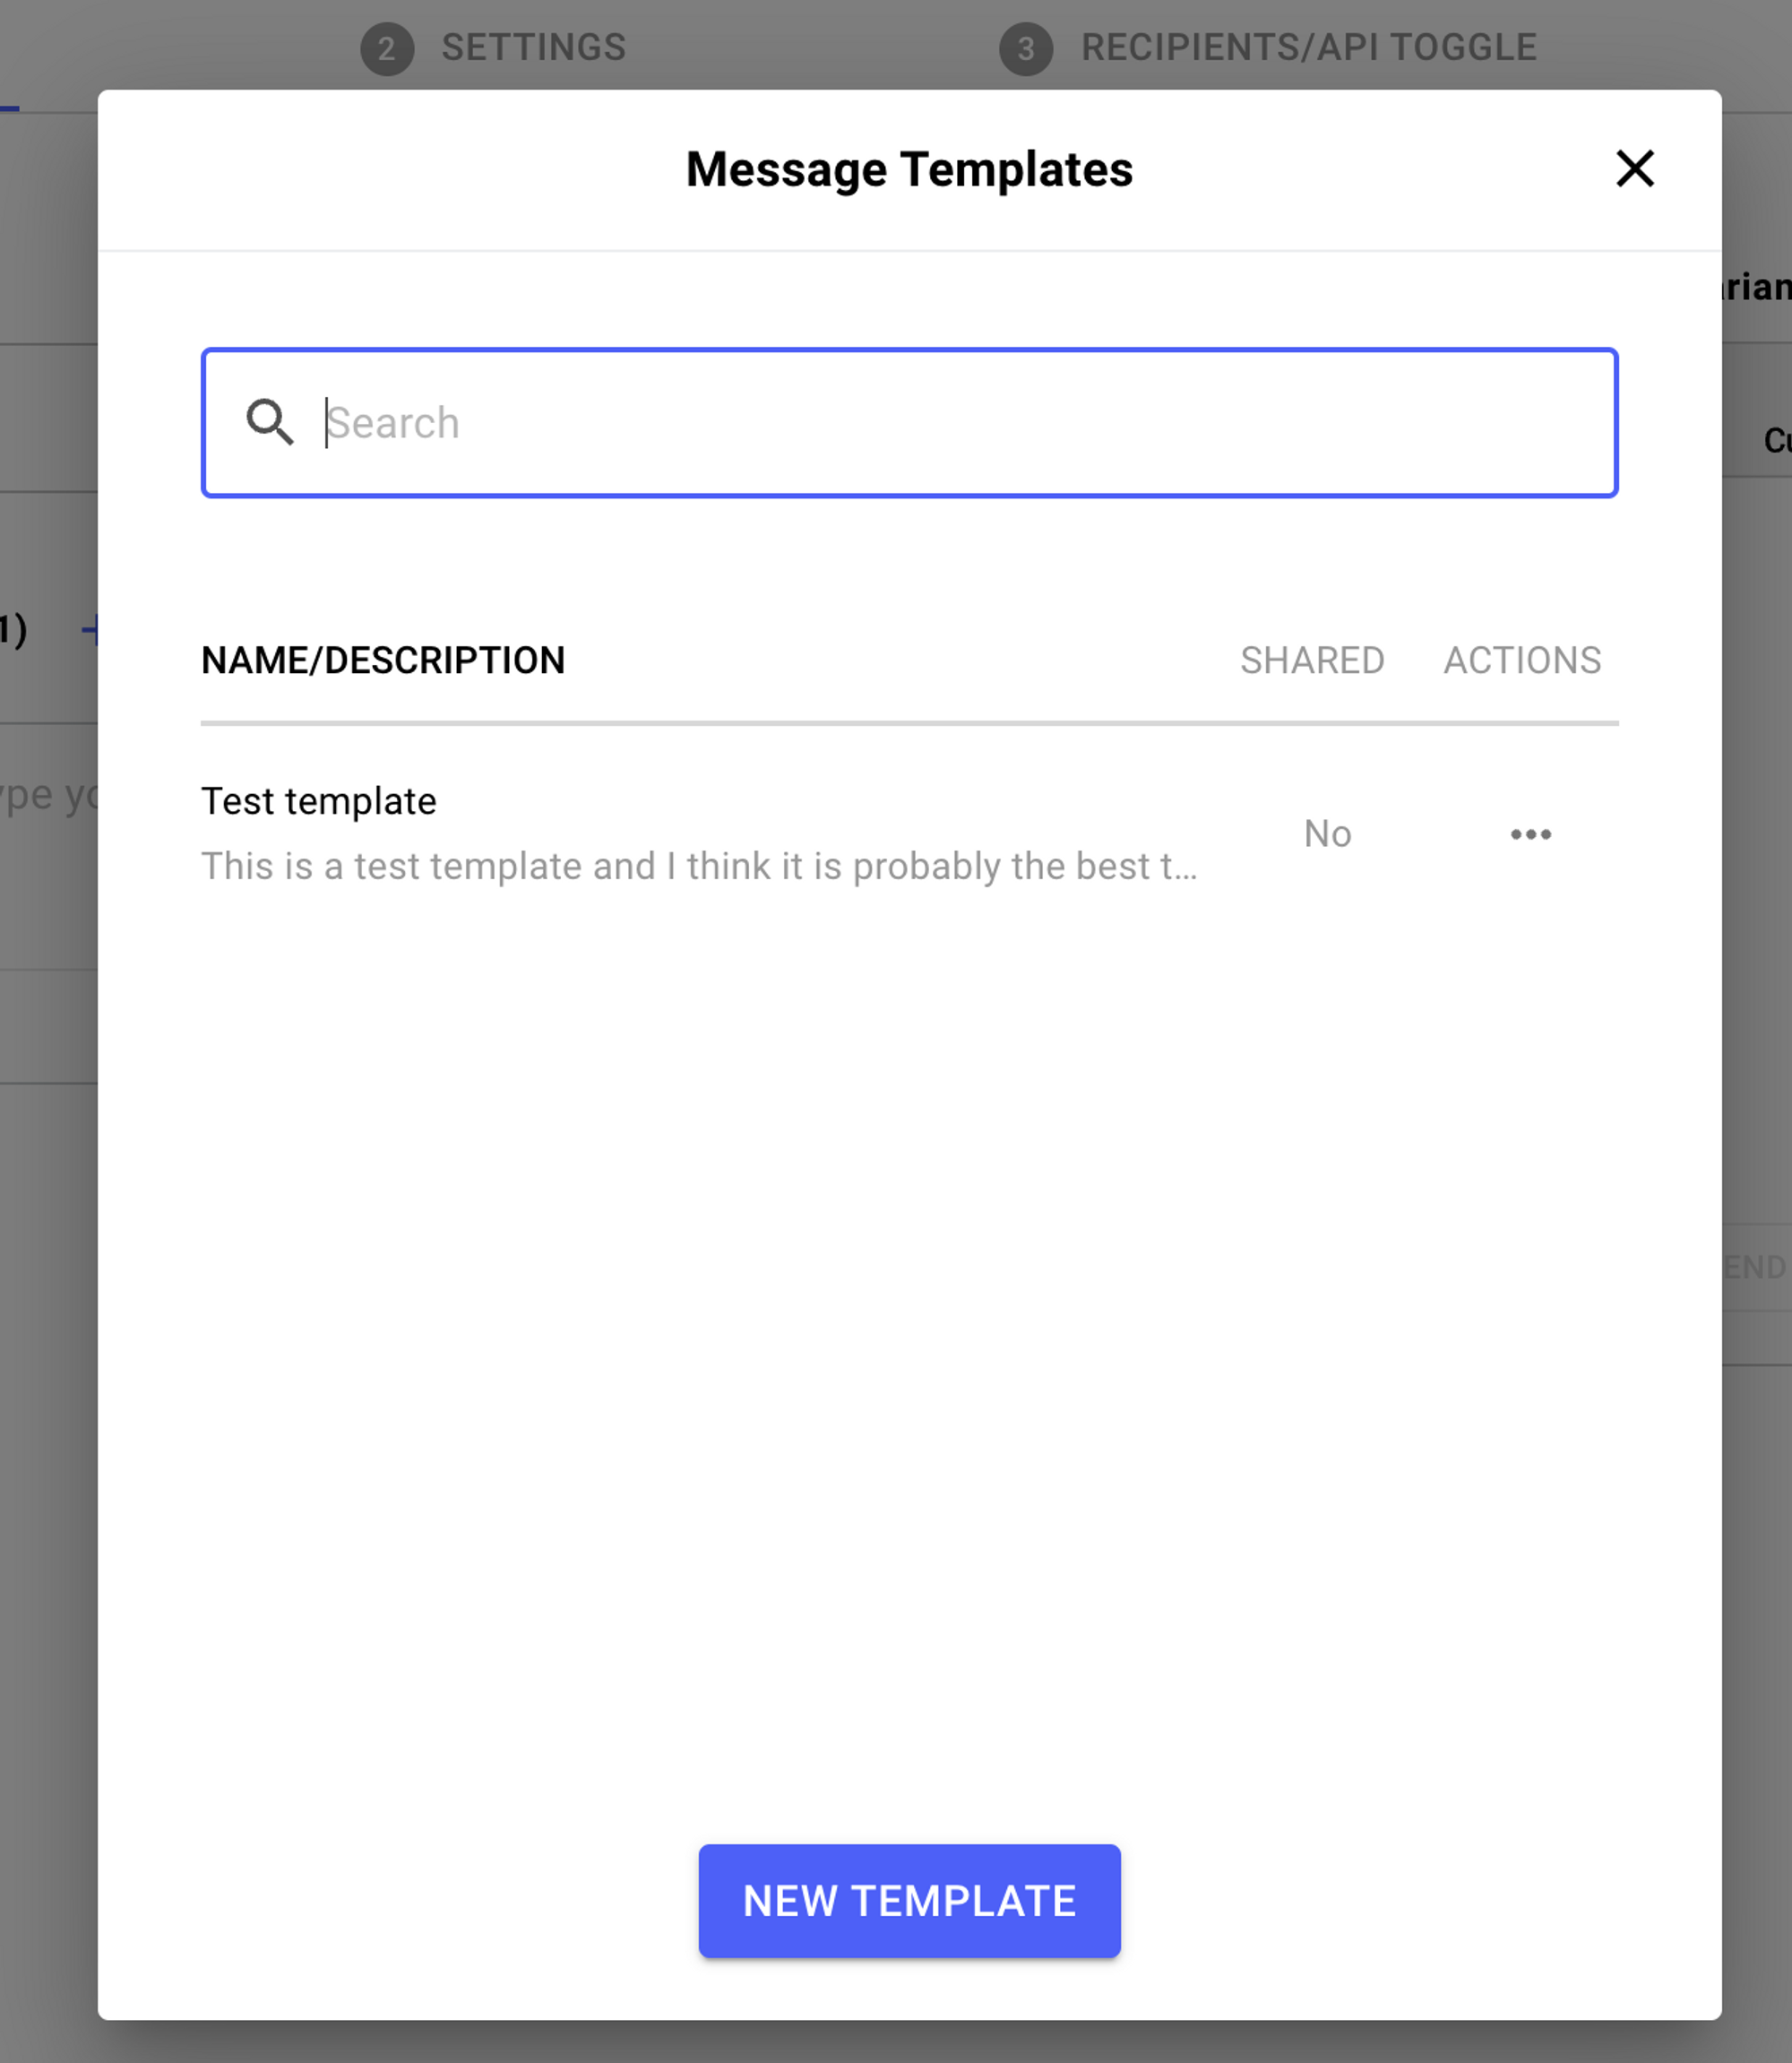
Load message templates
To prevent you from having to type in the same message over and over again, you can now load them from your saved message templates inside campaigns.
Settings
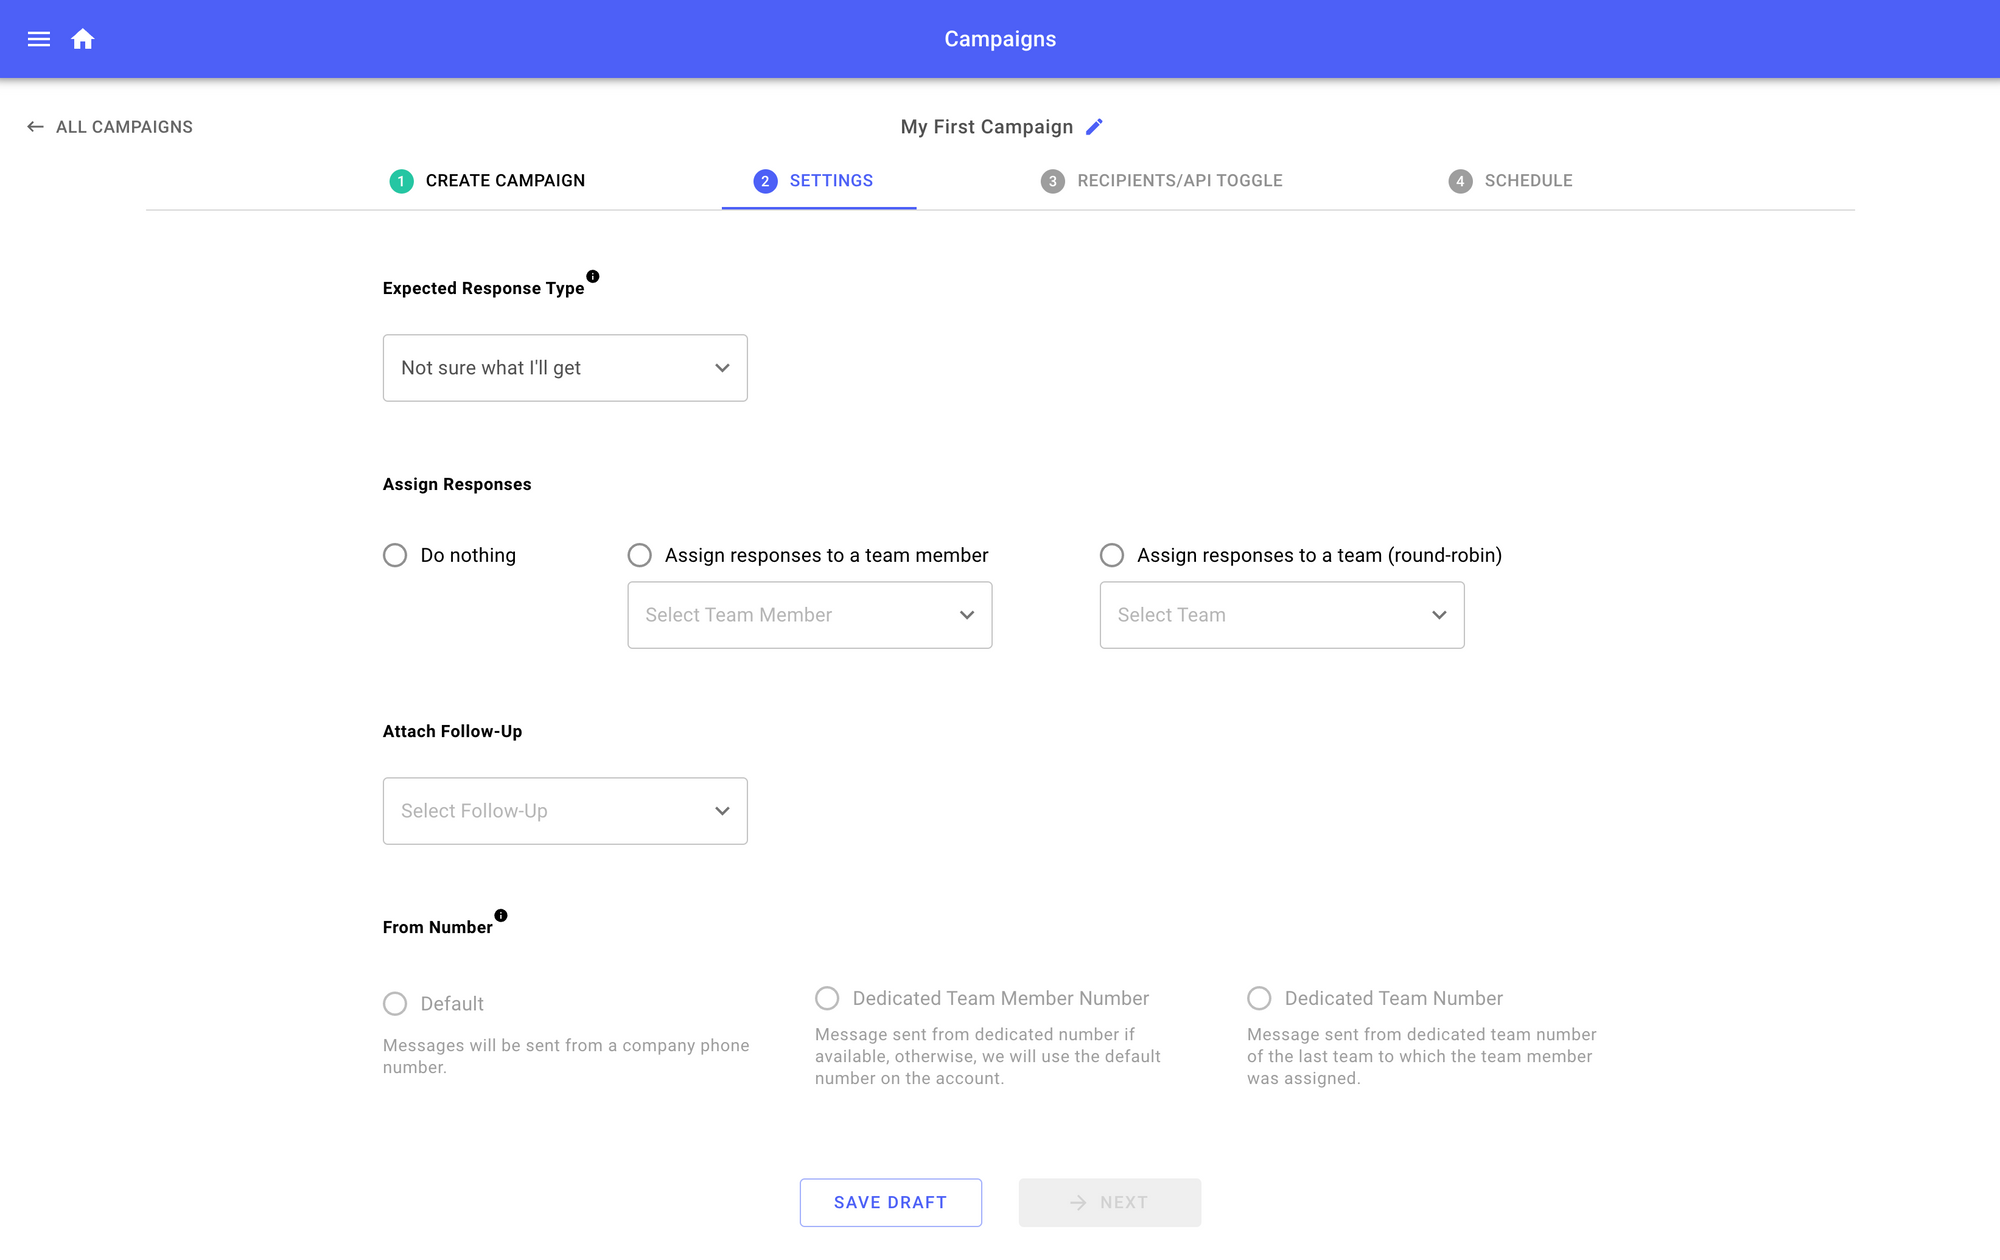
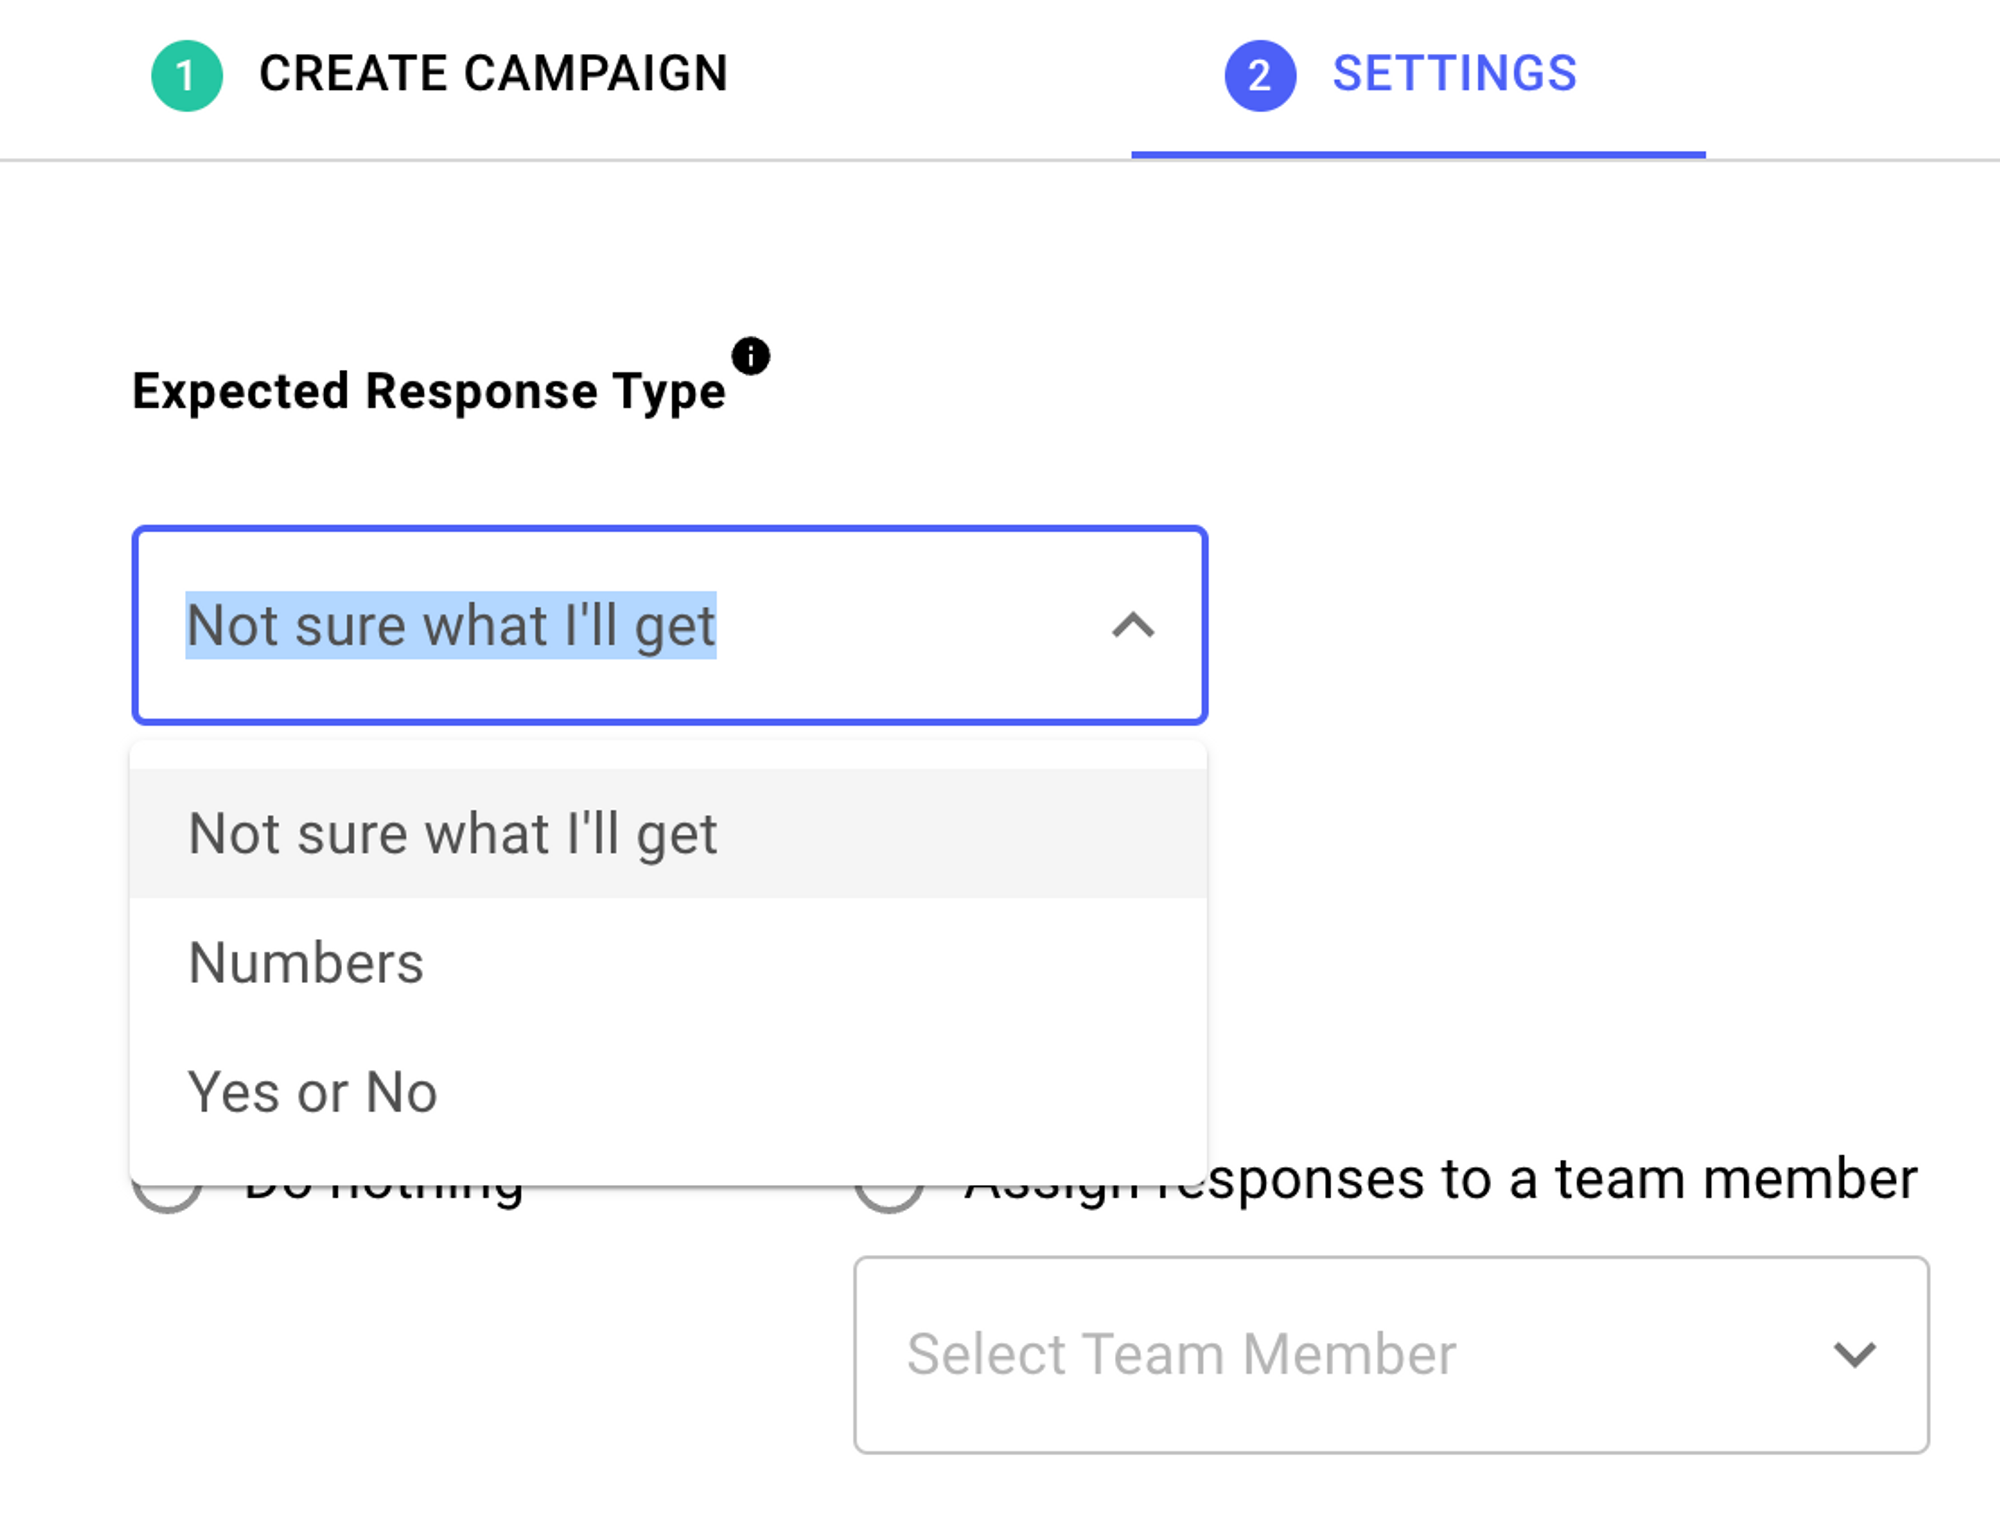
EXPECTED RESPONSE TYPE
Our campaign reporting will change to accommodate the responses you are looking to receive. The results columns will change depending on the value you choose between these options:
- Yes or No
- Number (i.e. 1 - 10) - this is great for NPS scores or collecting feedback.
- Example: “How you would rate our service, from 1-10?"
- Not sure what I'll get (any response)
Note
After the campaign is sent, you will not be able to change the expected response type.
ASSIGN RESPONSES
(Optional) If you would like to automatically assign all customers who respond to a campaign to a specific team member or team, click Assign responses to a team member or Assign responses to a team (round-robin). Then, in the drop-down, select the team member or team you would like to assign all responses from the campaign.
Note: Assign responses rules only take effect if a customer is unassigned at the time they reply to a campaign.
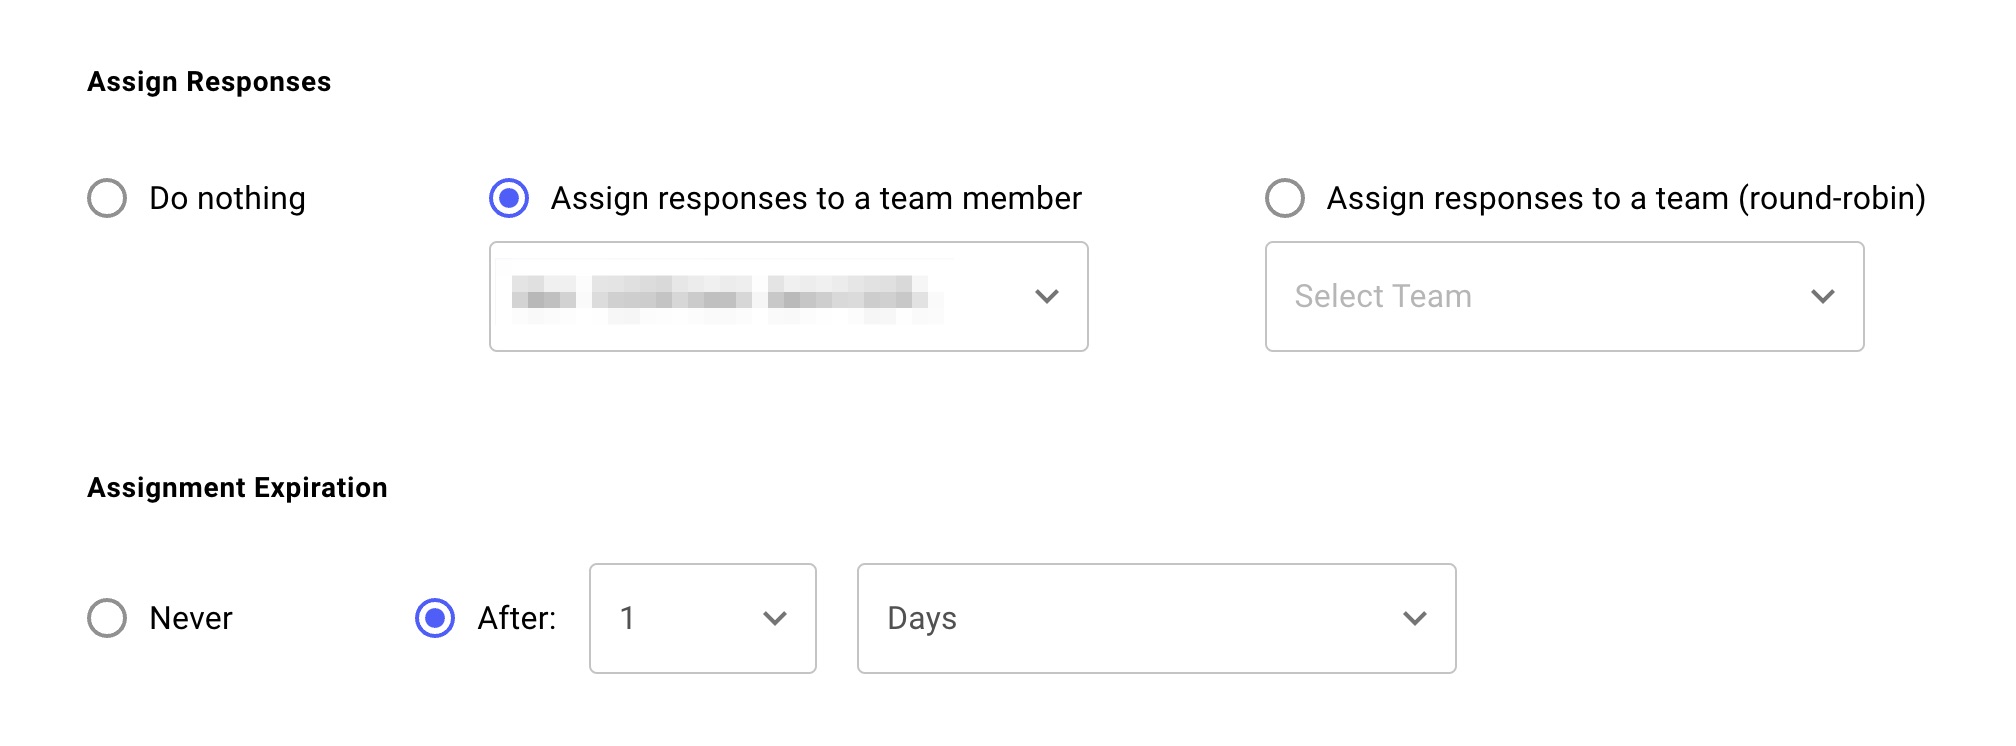
If you have chosen to assign responses to a team or team member, you have the option of specifying a period of time after which the assignment rule expires. Consider the example in the image below in which Assignment Expiration is set to 1 day.
- A customer who responds to a campaign message within 1 day of the date/time the campaign message was sent will be assigned to the specified team member
- A customer who responds to a campaign message more than 1 day after the date/time the campaign message was sent will not be assigned.
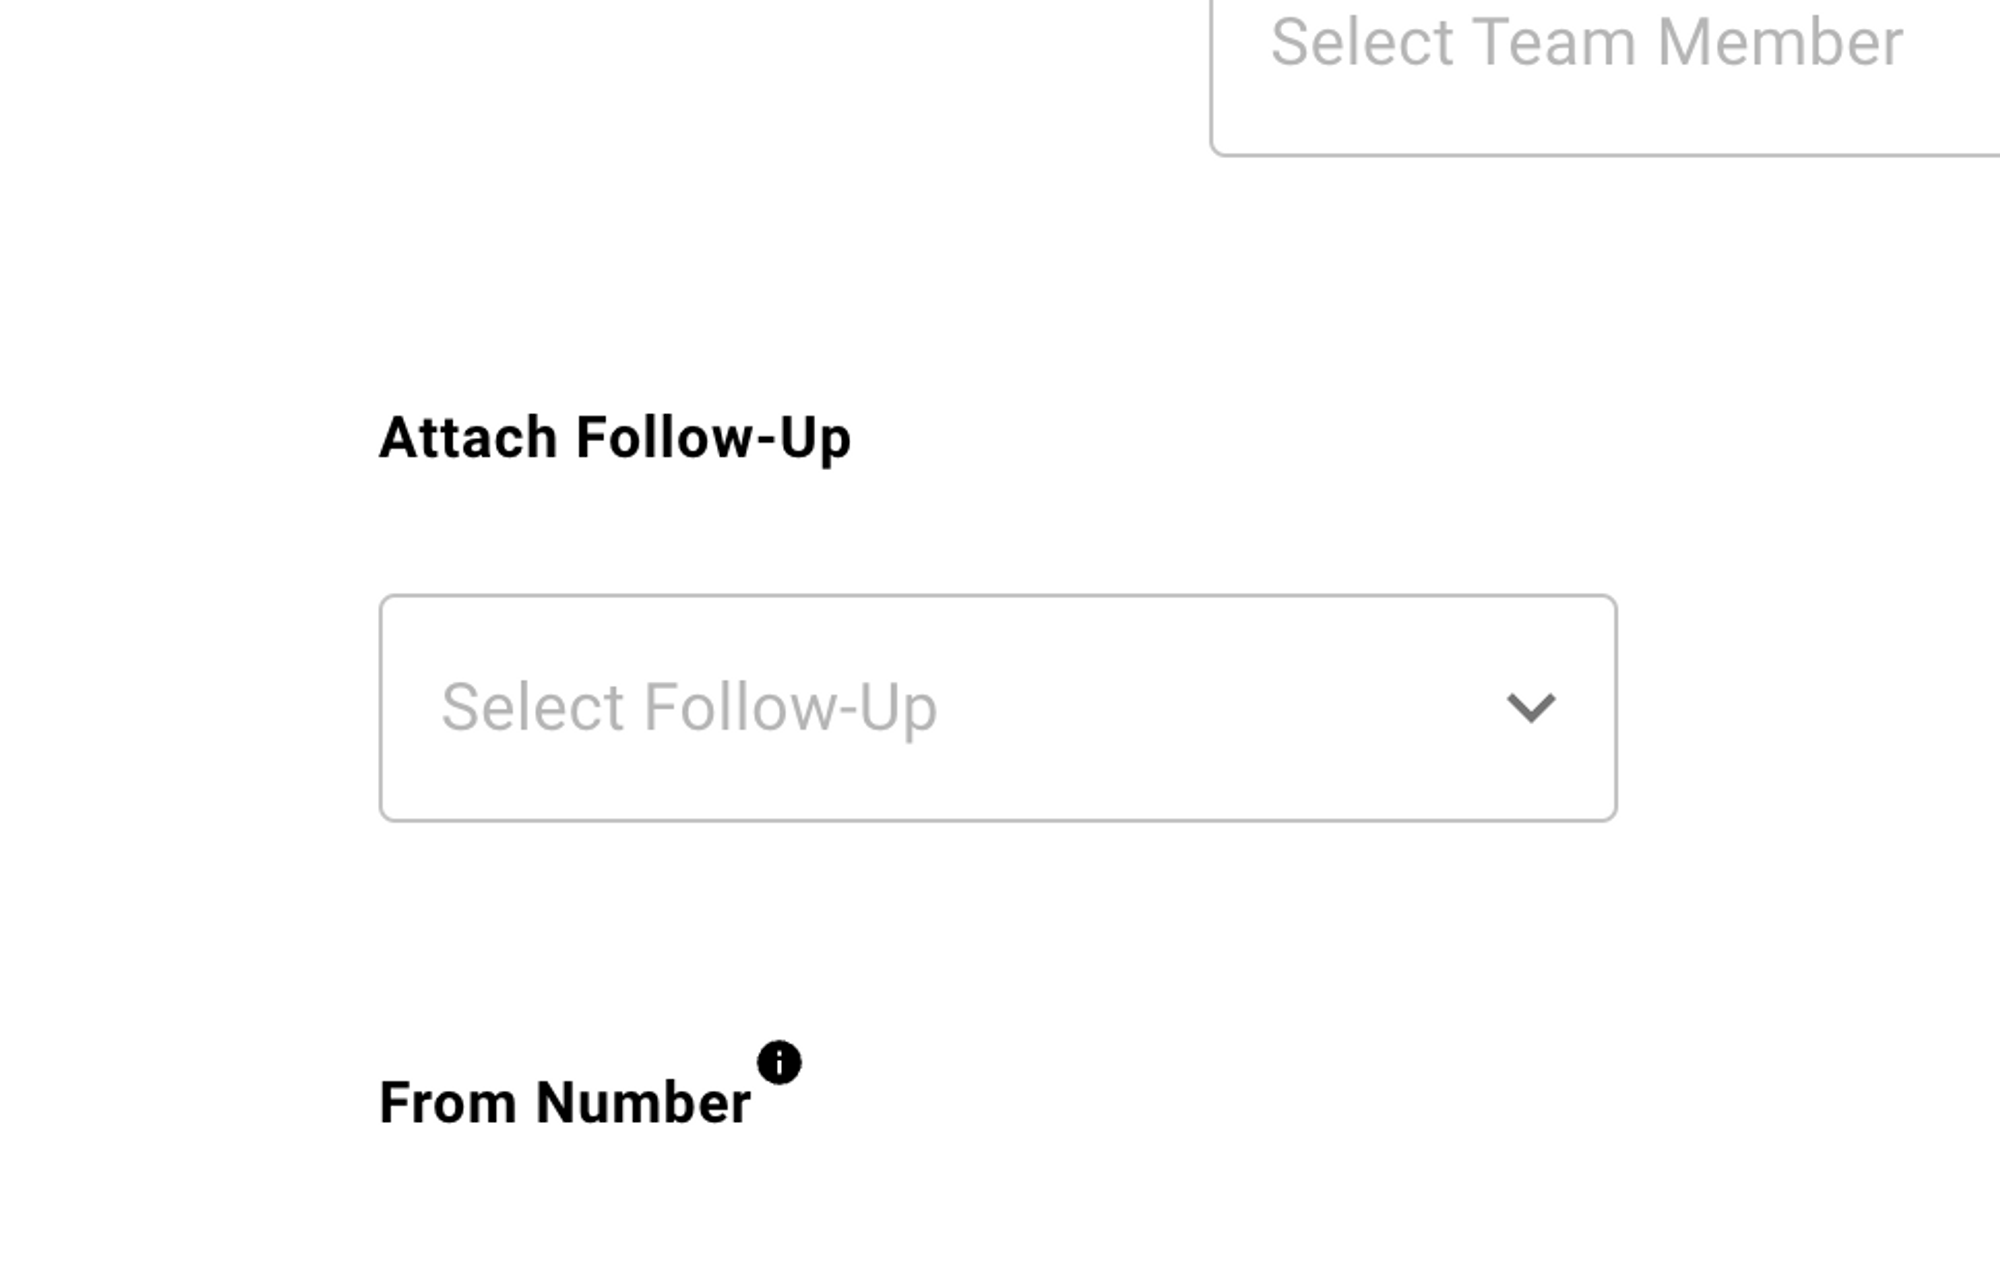
ATTACH FOLLOW-UP
(Optional) Under Attach Follow-Up, you can choose to schedule automatic Follow-Ups for the recipients of a Campaign.
The pull-down list will be populated with Follow-Ups you've already created. From the pull-down list, simply select the desired Follow-Up sequence.
Click Next or click on the next tab to continue with creating your campaign.
Recipients/API Toggle
When building and sending a campaign in Sonar, you must choose which customers from your customer database should receive a campaign message. This subset of your customers that your campaign will target is called an audience.
Creating an audience is done by filtering your customer database based on Customer Properties. In Step 3 of campaign creation you can create a filter, or groups of filters, to select the right customers from your customer database given the attributes of the audience that you want to target. You can use logical operators "AND" and "OR" to combine conditions in your filters. The "AND" operator allows you to select customers that satisfy multiple conditions simultaneously, while the "OR" operator selects customers that satisfy at least one of the conditions.
For example, suppose you want to send a message to customers who are active leads and live in the Northwest or California territory. In this case, you would create two filter groups, as shown in the screenshot below, to create an audience of customers that satisfy these conditions
Note
Properties must be set for the customer(s) first before you can send a campaign.
Select the customers of who you want to send the campaign to based on their property and value. In the Filter section, either type in the name of the property or click on the drop-down to find the property. Then, either type in the value or click on the drop-down to find the value.
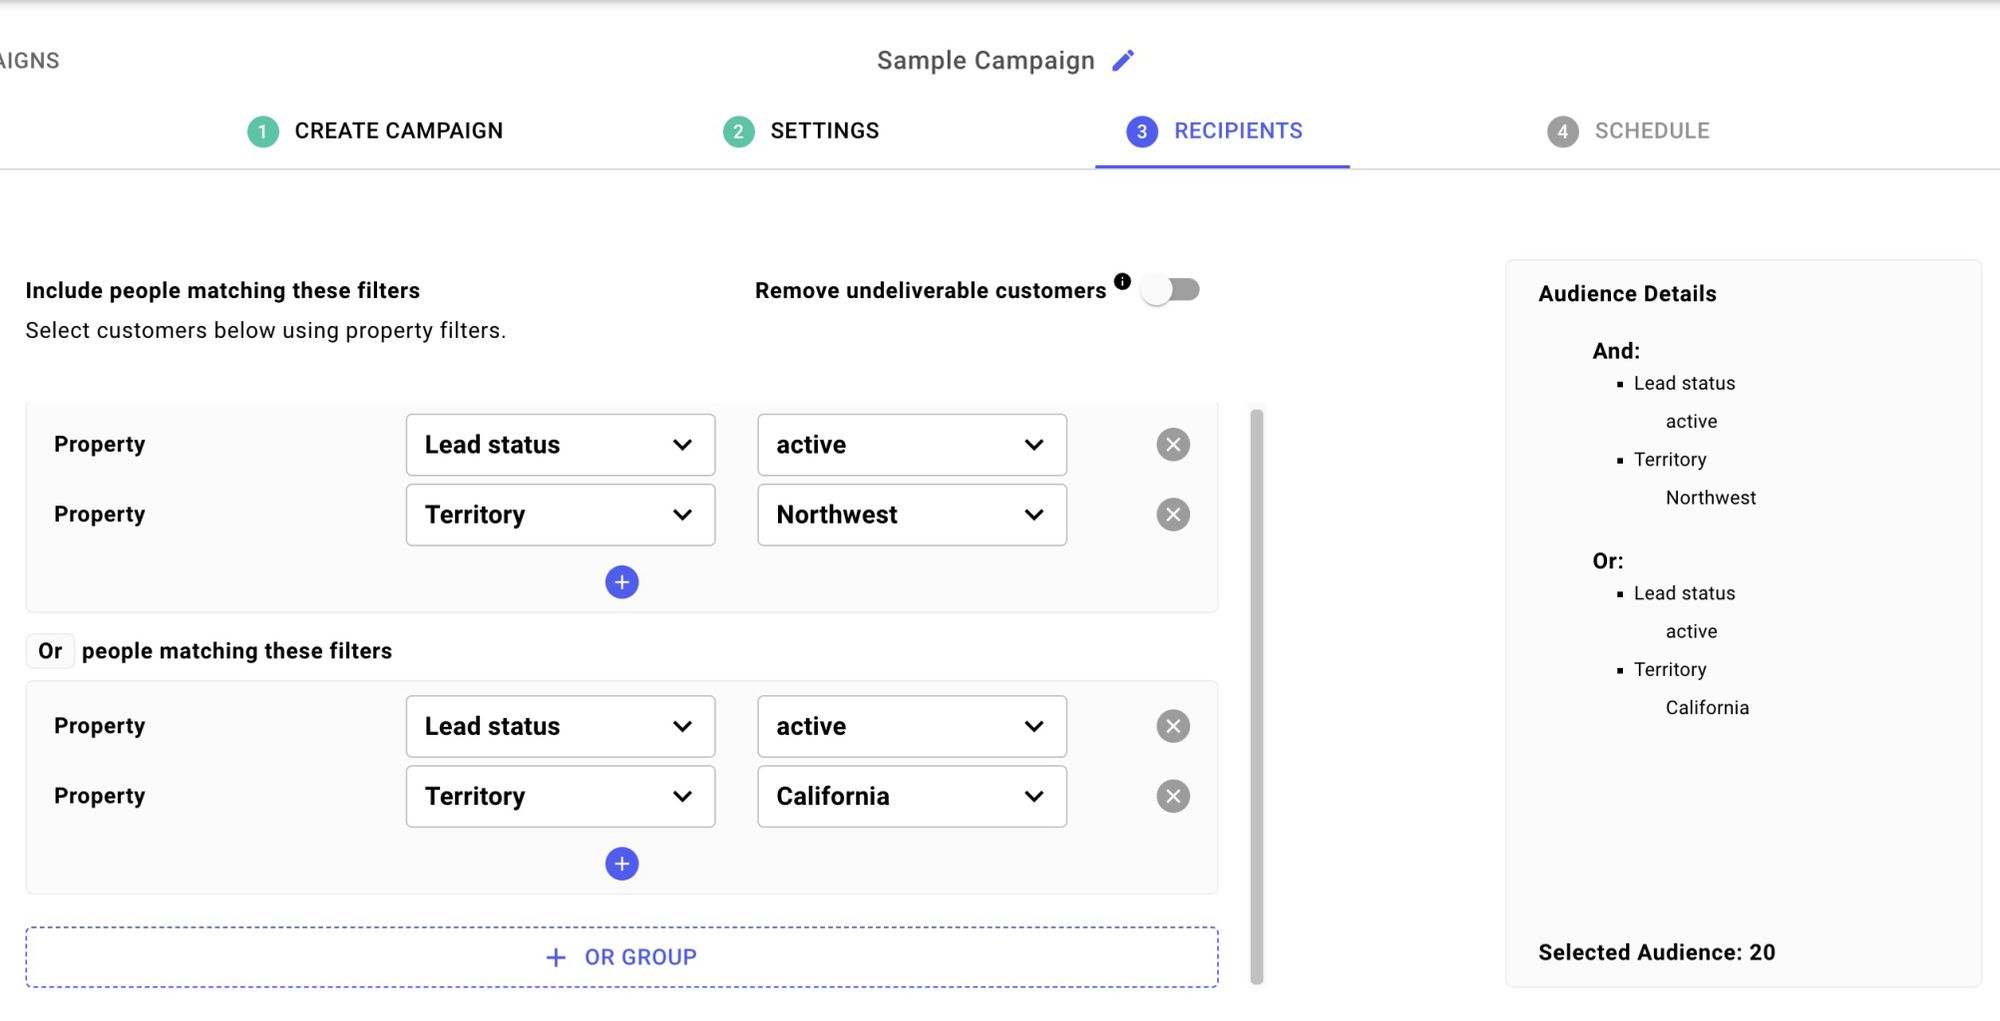
These filter groups create an audience that includes only active leads in 2 of the 5 territories.
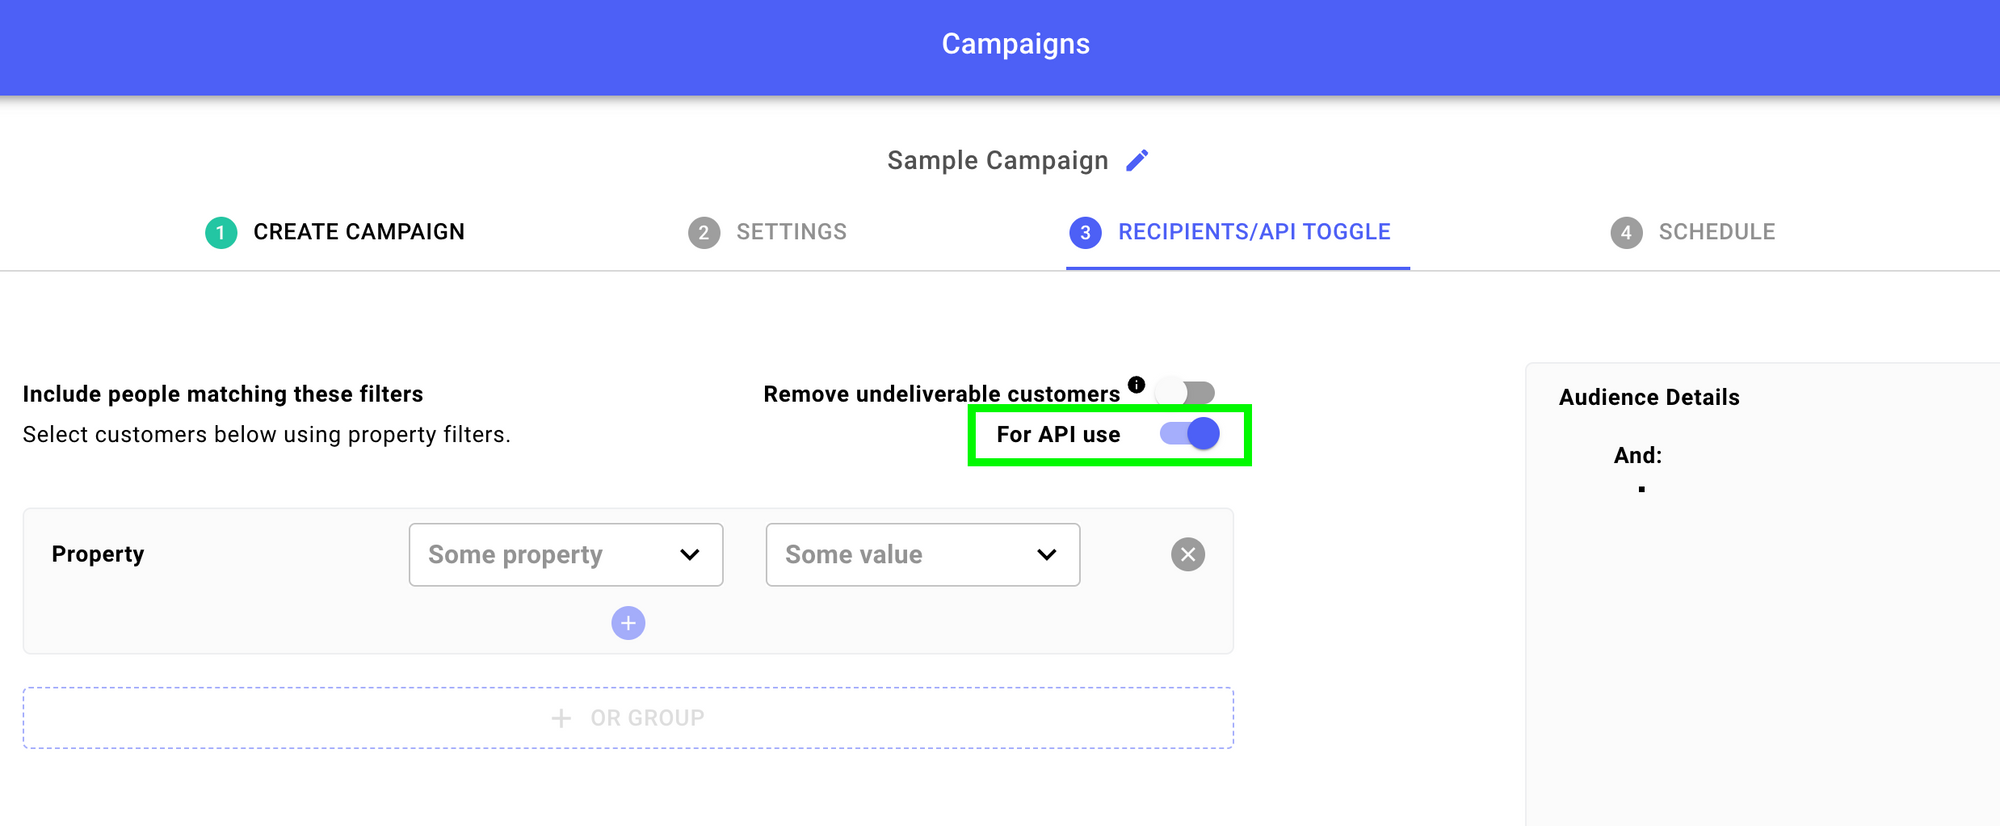
If your campaign isn’t meant to be sent to the entire audience at once (perhaps you want to trigger the campaign with the API or an integration) you don’t need to create an audience by creating filters. Instead you can toggle “For API use” to the on position. In the next step, scheduling, you’ll use the Ready to Send option.
Turning on the “Remove undeliverable customers” flag, will remove those who have previously failed on message delivery and are most likely to fail again. By turning the flag on / off, you’re able to see the total number of people affected for your campaign, before scheduling the campaign.
How the flag works — By turning on the flag, our system reviews all the users already in your selection criteria and filters out the users with the “Delivery Failed” property set. However, we only include a subset of error codes (from our complete list of error codes), as an inclusion criterion. It’s important to not manually change the value for this property for a given user, if you want the exclusion criteria to identify and remove those users.
Scheduling
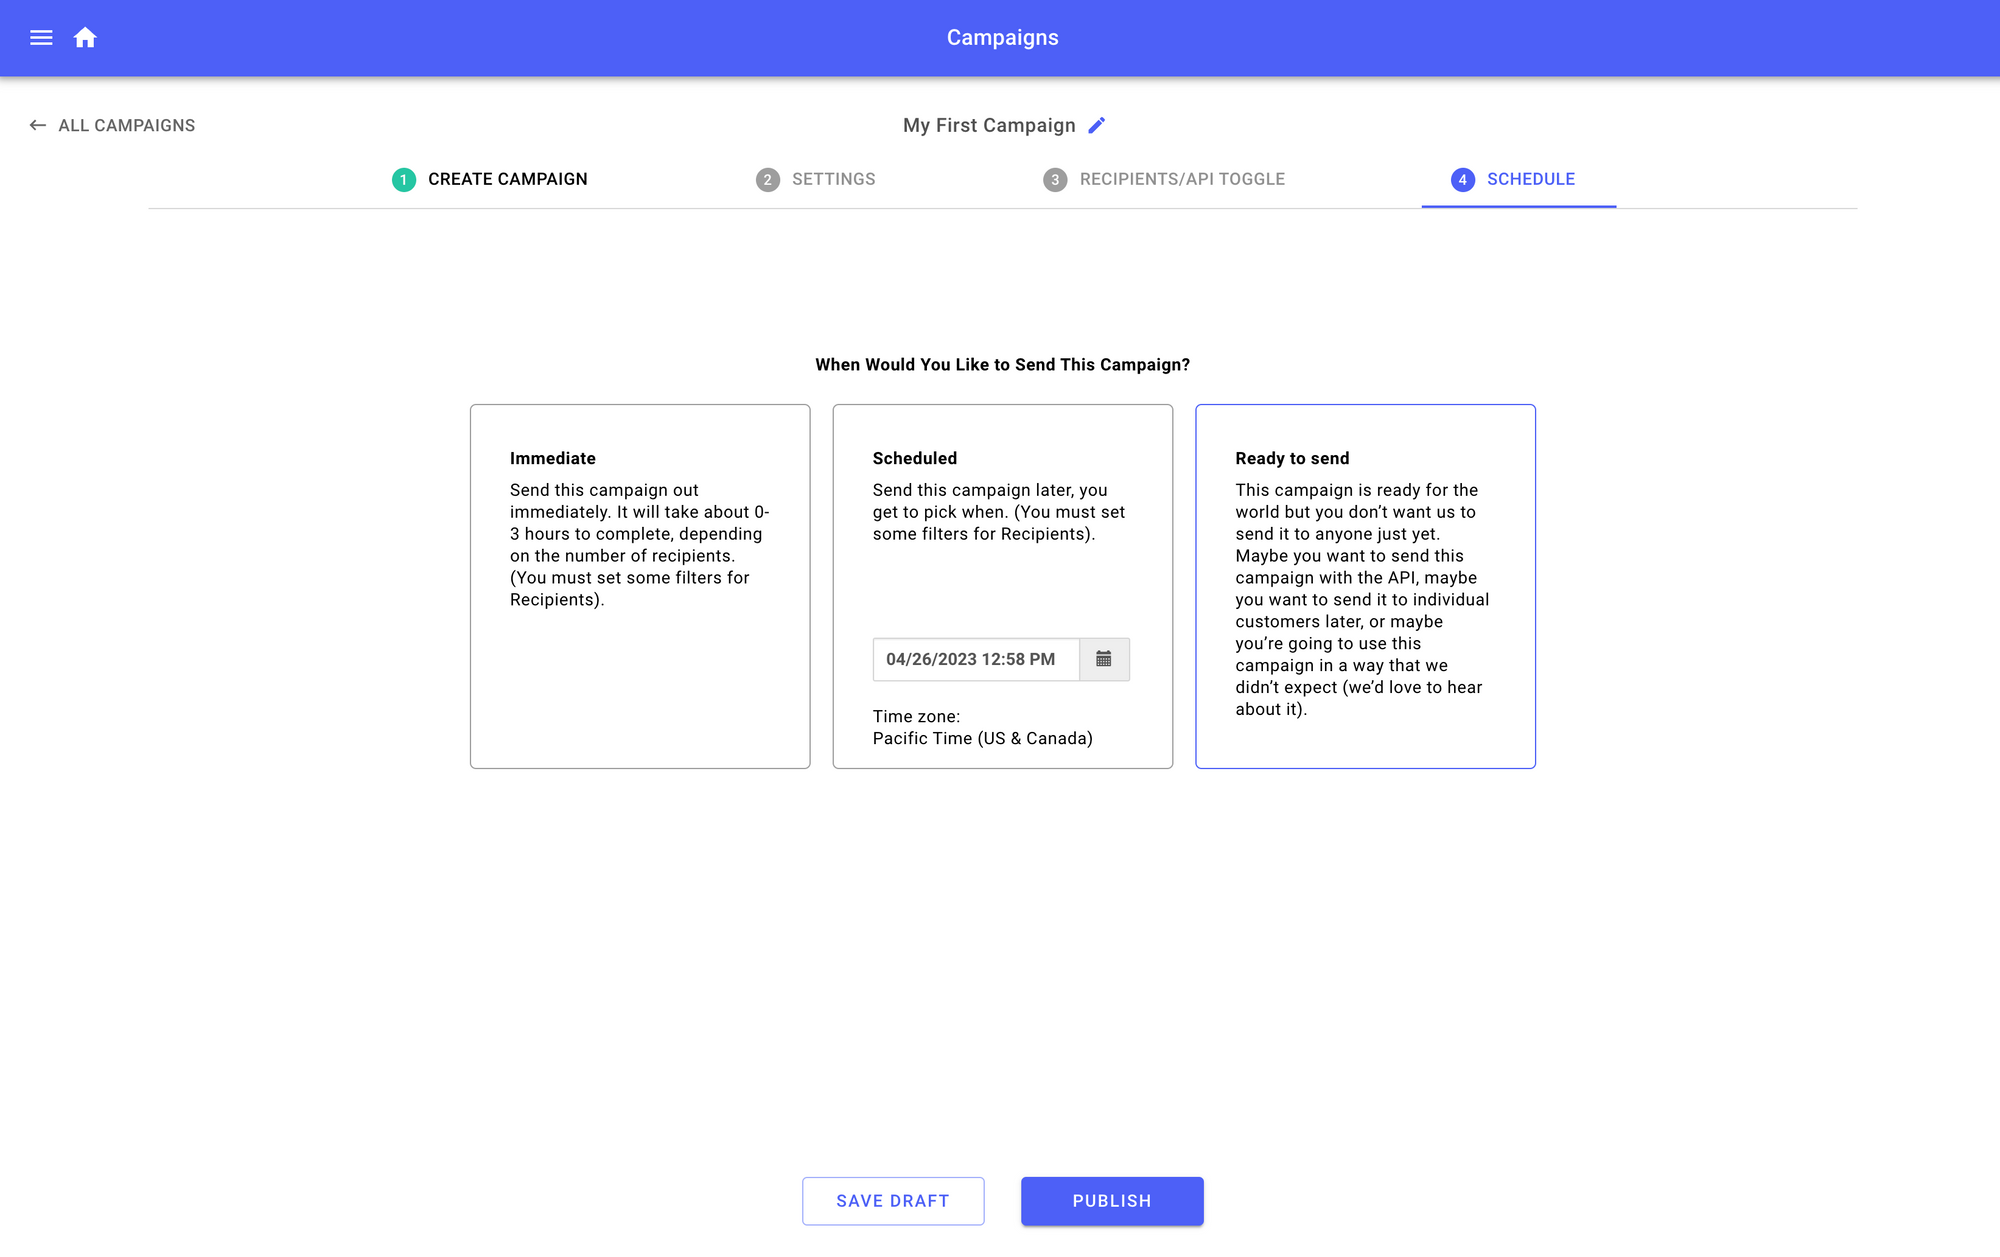
In the Scheduling tab, you can choose when you would like to send the campaign:
- Save as draft - This campaign isn't ready for the world just yet. We'll save it for you to work on later and prevent anyone from sending it out (including API calls)
- Immediate - Send this campaign out immediately, It will take about 0-3 hours to complete, depending on the number of recipients. (You must set some filters for Who).
- Scheduled - Send this message later, you get to pick when. (You must set some filters for Who).
- Choose a date and time.
- Time zone is dependent on your Company Settings in your Sonar account.
- Ready to send - Maybe you want to send this campaign with the API, maybe you want to send it to individual customers later, or maybe you're going to use this campaign in a way that we didn't expect (we'd love to hear about it). In any case, this campaign is ready for the world, but you don't want us to send it to anyone just yet.
Campaign Results
To check out the results of your Sent campaign, click on View Results from the dropdown of the campaign you are interested in on the main Campaigns page.
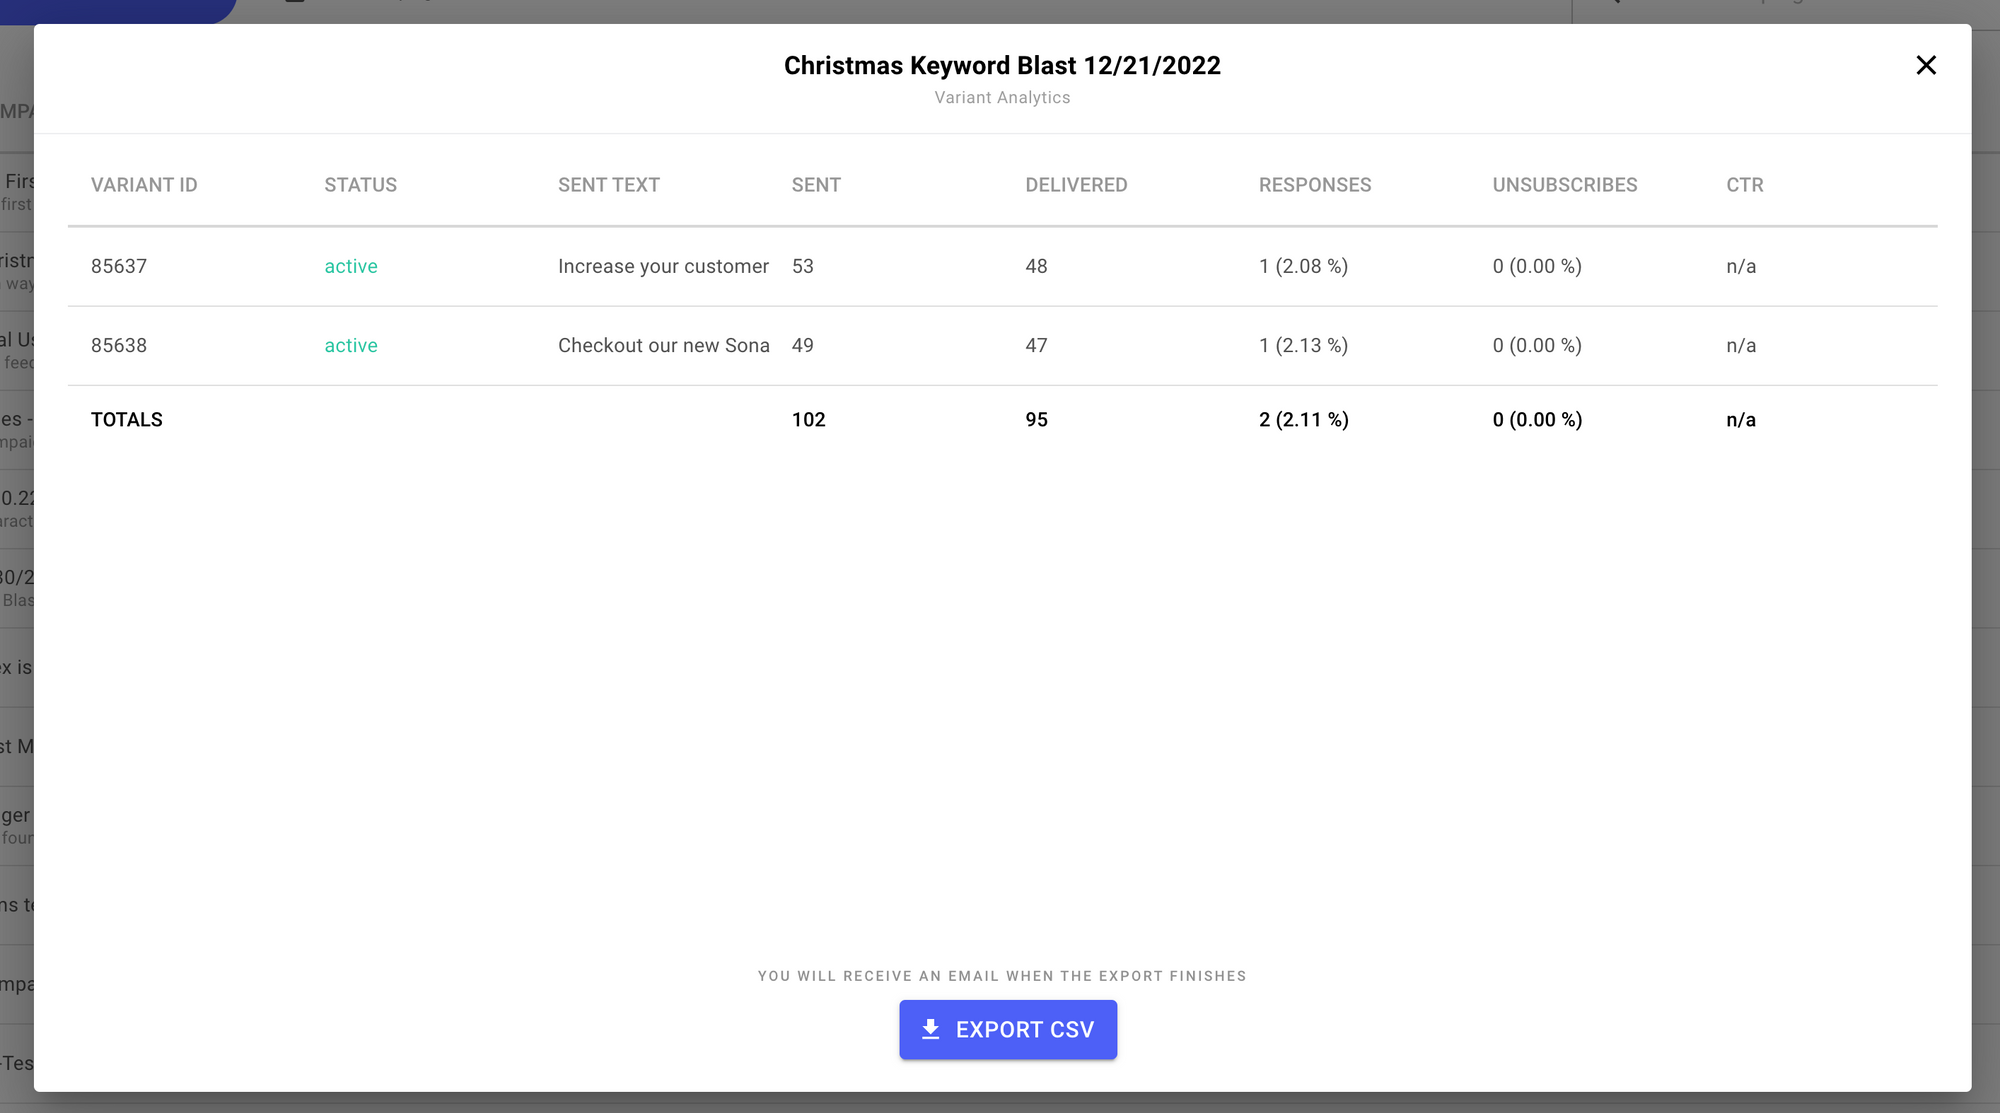
- Sent - The number of customers you've sent each text message variant to.
- Responses - The number of customers who responded to each text message variant.
- Unsubscribes - The number of customers who unsubscribed from each text message variant.
- CTR - The click-through-rate of each variant.
You can download your customers' responses, by clicking on the Export CSV button.
Editing Message Variants
Sometimes you want to change or edit the message variants in your campaigns. Here's how you can from the Campaigns page.
- Click on the Edit Campaign button for the Campaign you'd like to make changes to
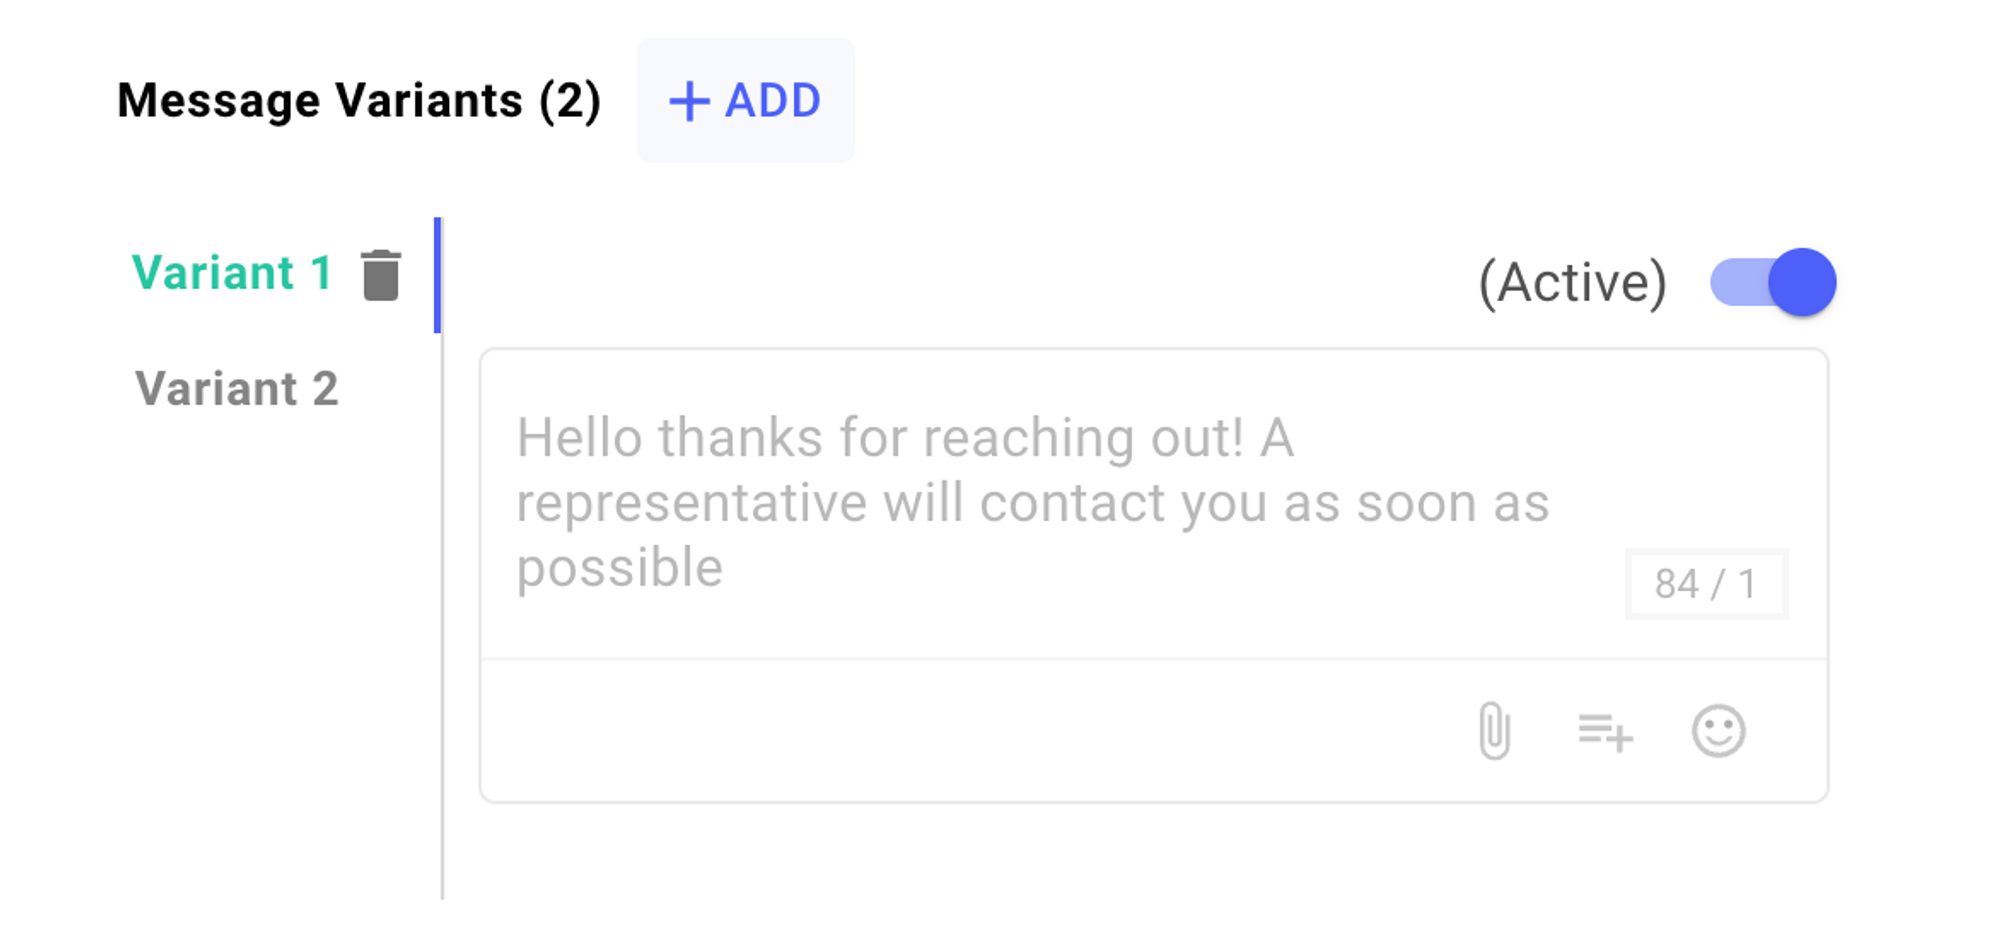
- In the Create Campaign tab, you'll see at least one message variant with the toggle button set to "ON"
- Switch the toggle button to "OFF" for the message variant you want to change or edit.
- Click on **+ Add** to enter a new message variant or the edited version of your message variant.
- Click on **Next** and then **Save Draft**.
FAQ
Can I delete a specific message variant of my Campaign?
Because each variant has its analytics in the campaign results section, you're unable to delete variants from an active campaign. However, you can turn off variants by using the toggle above each variant.
How many message variants can I have?
Currently there isn't a limit on the number of message variants you can create.
Updated over 2 years ago