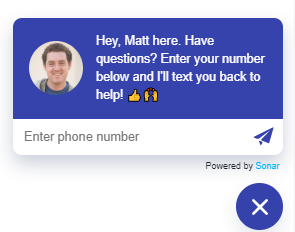
Chat Widget

Chat Widget Image
Installation
To add the chat widget to a page, add the following HTML tag within the <head></head> tag of the page. Please note that "quotes" indicate a value should be copied in exactly, whereas [brackets] indicate a value that is specific to your code:
<script src="https://s3.amazonaws.com/sonar-chat-widget/production/bundle.js" data-widget-id="[your-chat-widget-id]" id="sonar-chat-async-embedder"></script>
You can then display the chat widget and open it on the page using the following Javascript:
window.SonarChatWidget && window.SonarChatWidget.display()
The closed() method will render the widget on the page but minimize the widget to just show the chat bubble.
window.SonarChatWidget && window.SonarChatWidget.closed()
Note
We recommend having the
window.SonarChatWidget &&check (or something similar) in case there is some issue with the script or the user's browser
Settings
There are a number of settings that you can use to customize your chat widget. The following settings are configurable:
| Setting Key | Description |
|---|---|
| initial_message_text | The text displayed when the widget first opens |
| success_text | The text that appears after a successful submission |
| delay | The delay in milliseconds before the widget opens |
| primary_color | The hex color for the widget (e.g. "#00B4FF") |
| margin | Custom CSS margin applied to the widget. Should be a string matching the standard CSS margin syntax (e.g. "0px 25px 0px 0px") to set a margin of 25 pixels on the right side |
| avatar_user_email | The email of the Sonar user whose avatar will appear in the widget |
| campaign_id | The slug of the campaign that should go out to a customer who submits their number. You can get this slug from the Campaigns page in Sonar |
| customer_properties | A set of properties to set on the customer in Sonar.The following properties will be updated directly on the customer: - first_name - last_name All other values will be created as properties attached to the customer. Example: { first_name: 'Tom', from_widget: 'true' }That will update the customer's first name to "Tom" and set a property on the customer with the name "from_widget" and a value of "true". |
You should set defaults for each of these settings, but you can also override the default setting on a page. To override any settings, you would pass them into the call of SonarChatWidget.display like the following:
SonarChatWidget.display({
  initial_message_text: 'Hey, this is a different message!',
  campaign_id: 'Other_Campaign_12345',
  // default properties will be preserved unless overwritten by a matching property here
  customer_properties: {
		prop_with_default: 'new value',
    other_prop: 'true'
  }
})
In addition to the display method, there is also an update method that you can use to update the settings of the widget using JS. This can be useful if you need to change message text or customer properties based on the user's actions on the page.
It is called with a settings object with the same structure as the call to display:
SonarChatWidget.update({
  initial_message_text: 'Looks like you clicked a button on the page!',
  customer_properties: {
    button_clicked: true
  }
})
These settings and properties will be merged with the existing ones, preserving any that are not overwritten and adding new ones. This will reset the delay timer (to an updated delay if provided, or to the original delay) if the widget had not yet opened.
Updated about 3 years ago