Hubspot
The Sonar app (beta) for Hubspot enables Hubspot Workflows to trigger Sonar to take actions such as sending a message to a Contact.
Introduction
Hubspot has become one of the most popular business technology suites. More and more businesses centralize their operations and workflow around Hubspot tools.
Businesses that use Sonar for SMS messaging rarely do so in isolation; meaning many (if not most) Sonar customers need their SMS communication to be coordinated with other communication channels and strategies that are often orchestrated through a CRM or similar software.
The Sonar app for Hubspot is built so that you can automate key actions in your SMS strategy using Hubspot's automation engine: Workflows. Installing the Sonar app in your Hubspot account enables your Workflows to trigger five different Sonar actions.
Sonar Workflow actions:
- Send a message (to a Contact)
- Send a campaign message (to a Contact)
- Add or update a Customer in Sonar
- Schedule a Follow-up for a Customer
- Assign a Contact owner to a Customer in Sonar
Things to know before you get started
Subscription type
The Sonar app for Hubspot is built to work specifically with Hubspot Workflows. Workflows are available for these Hubspot subscriptions
.](https://files.readme.io/51f78f1-2023.08.21_Hubspot_subscriptions.jpg)
Hubspot may change subscription requirements. For a current list of subscriptions that include Workflows, refer to Hubspot documentation.
One-to-one account relationship
You can connect one Sonar account to one Hubspot account.
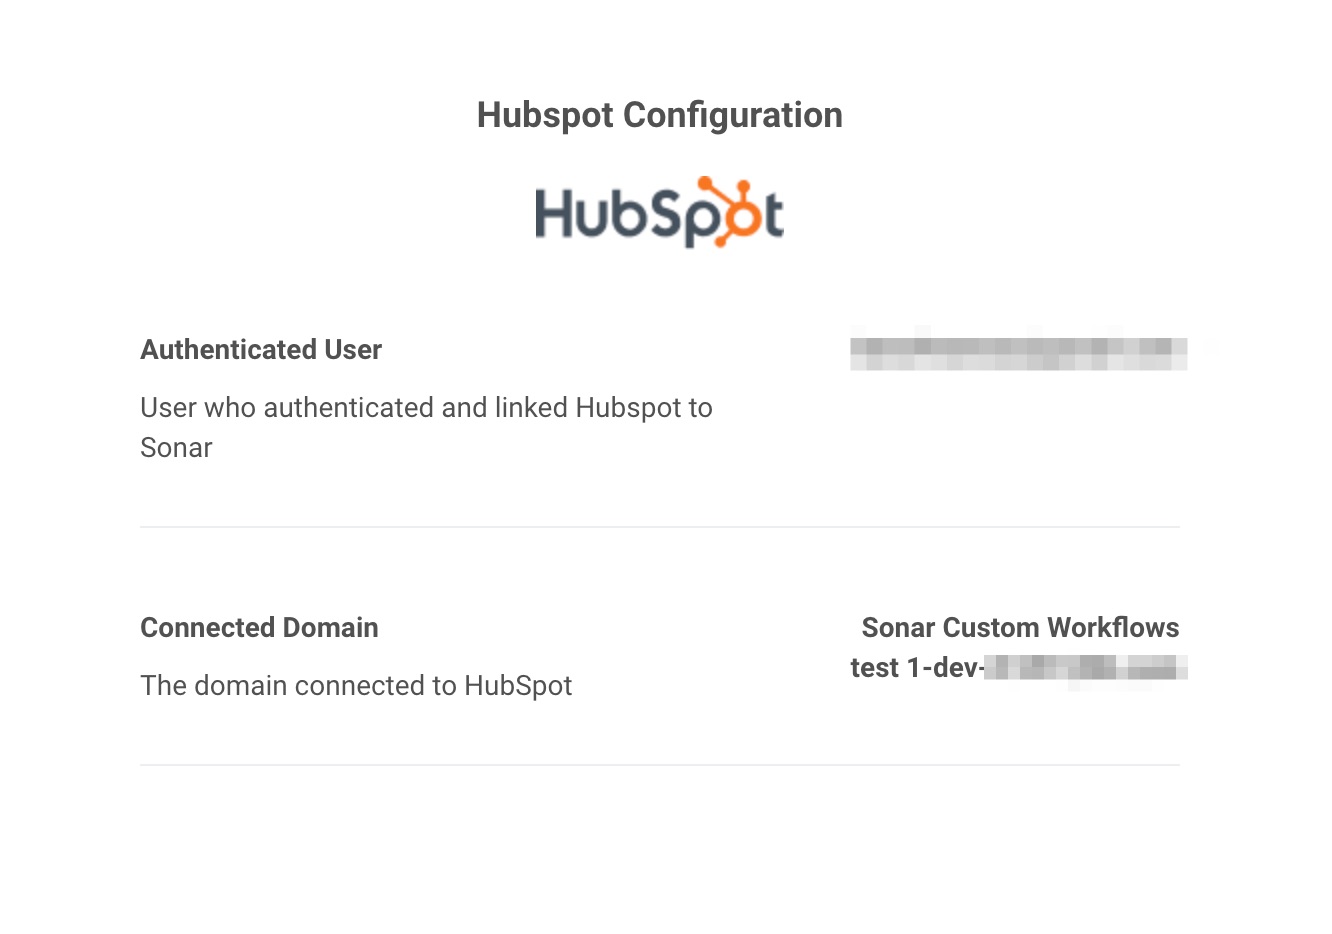
You'll be able to see what Hubspot account is linked to your Sonar account from the Hubspot integration page.
BETA period for the Sonar app
The Sonar app for Hubspot is currently in a public BETA. We want to work with you to ensure you can make the most of the Hubspot app and to hear your questions and feedback. Please reach us by email at [email protected] or by text message at 833-242-9381.
The Sonar app for Hubspot is not (yet) listed on the Hubspot App Marketplace. It will be listed on the app marketplace after the BETA period closes. Until then, you can access, enable, and disable the Sonar app for Hubspot from the Hubspot integration page in the Sonar dashboard.
When installing the Sonar app for Hubspot you might see a warning message that warns you "you're connecting an unverified app". Don't worry, this is because the app has not (yet) finished the review process conducted by Hubspot. You can always disconnect your Sonar from your Hubspot account through the Hubspot integration page in Sonar or from Hubspot (settings >> integrations >> connected apps).
The Hubspot Contact and the Sonar Customer
Both the Hubspot "Contact" and the Sonar "Customer" represent a person with whom your business has a relationship. This could include leads, prospects, and current or past customers. If you work at a B2B company, your Contacts are probably related to Company records in your Hubspot account.
The Sonar actions for Hubspot Workflows are built for Contact-based workflows; Workflows in which Contacts are enrolled. We had some of these use cases in mind:
- Sending a message to a new Contact after some kind of event such as a form submission
- Assigning a Sonar Customer to the team member who is the Contact owner in Hubspot
- Setting up a Contact to receive a drip messaging sequence using Sonar Follow-Ups
- Pushing Contact information (i.e. properties) into Sonar in order to segment your audience for a Campaign or so that your team members can understand who they're messaging within Sonar without having to take extra steps to find the Contact record in Hubspot
How to use the Sonar App for Hubspot
Connecting your Sonar and Hubspot accounts
Connecting Sonar to your Hubspot account is done in a few short steps.
Users must be either a super admin or have App Marketplace Access permissions to connect apps to their HubSpot account.
- Navigate to the Hubspot integration page in your Sonar dashboard.
- Click CONNECT
- Your browser will navigate away from Sonar or potentially open a modal window
- Login to Hubspot (if you're already logged into Hubspot in your browsing session, this step won't be necessary)
- Choose which Hubspot account you want to connect Sonar to
- Click Connect app
Your browser will return you back to the Hubspot integration page in your Sonar dashboard. It will now display the domain of the connected Hubspot account as well as the user who connected Hubspot and Sonar.
Choosing and configuring a Workflow action
The following tips and screenshots apply to editing a Workflow that you've already created. For instructions on how to create a workflow, check out these docs from the Hubspot knowledge base: Create workflows.
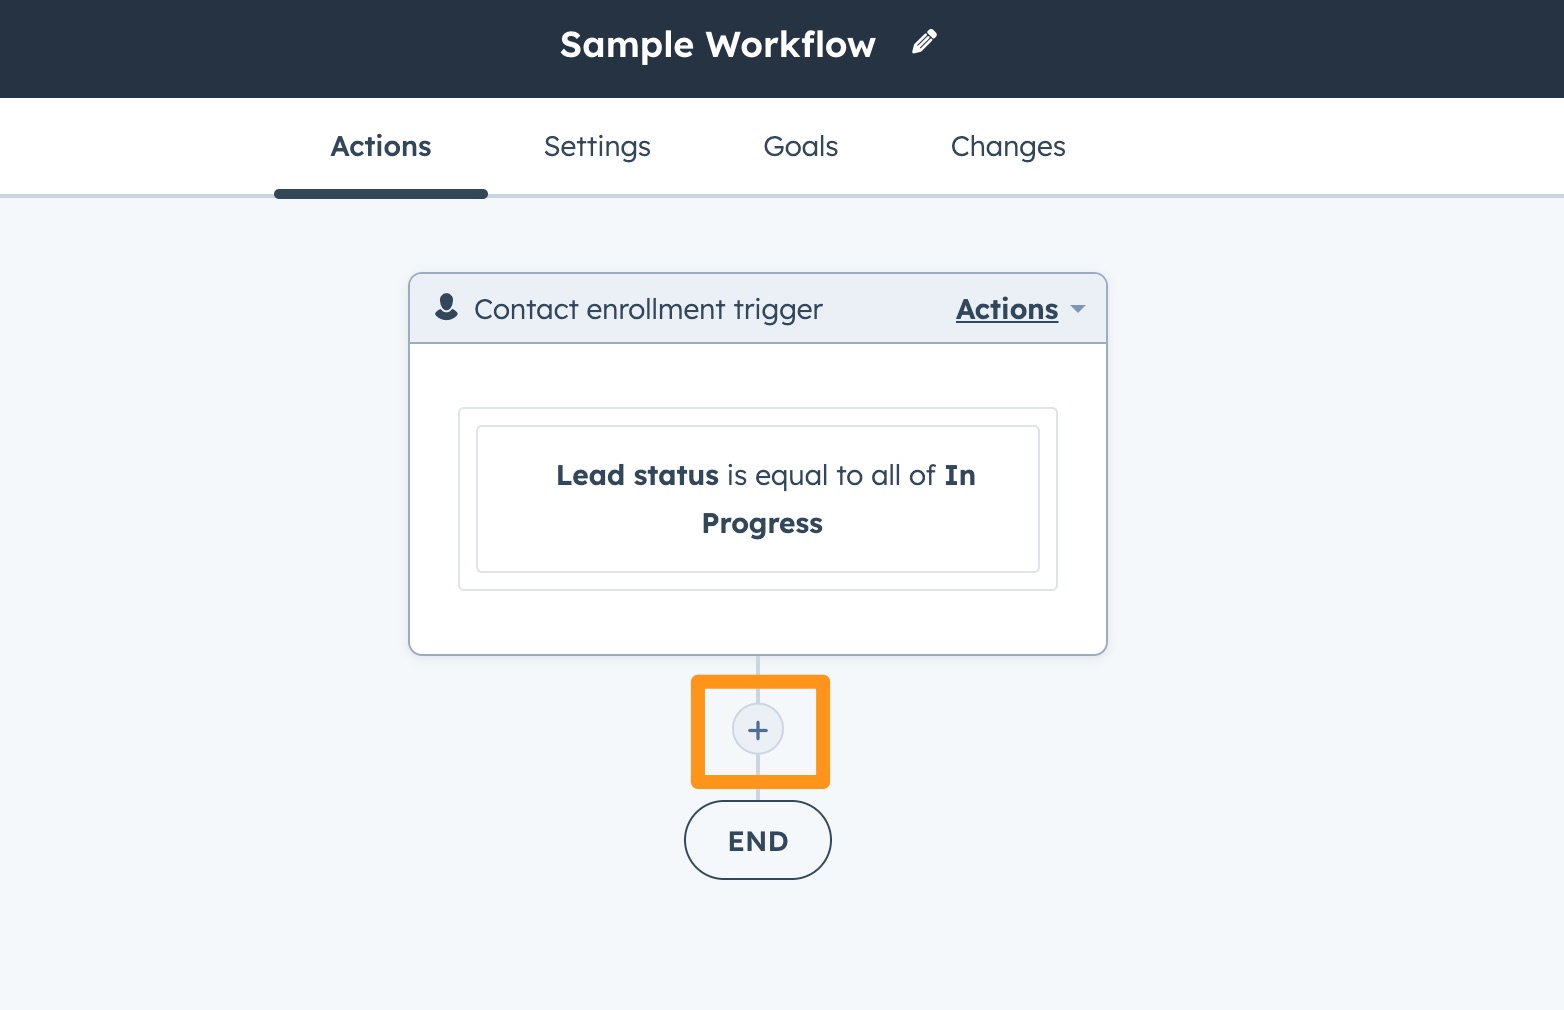
Once you've configured a Trigger for your workflow, you can add an action using the "+" button.
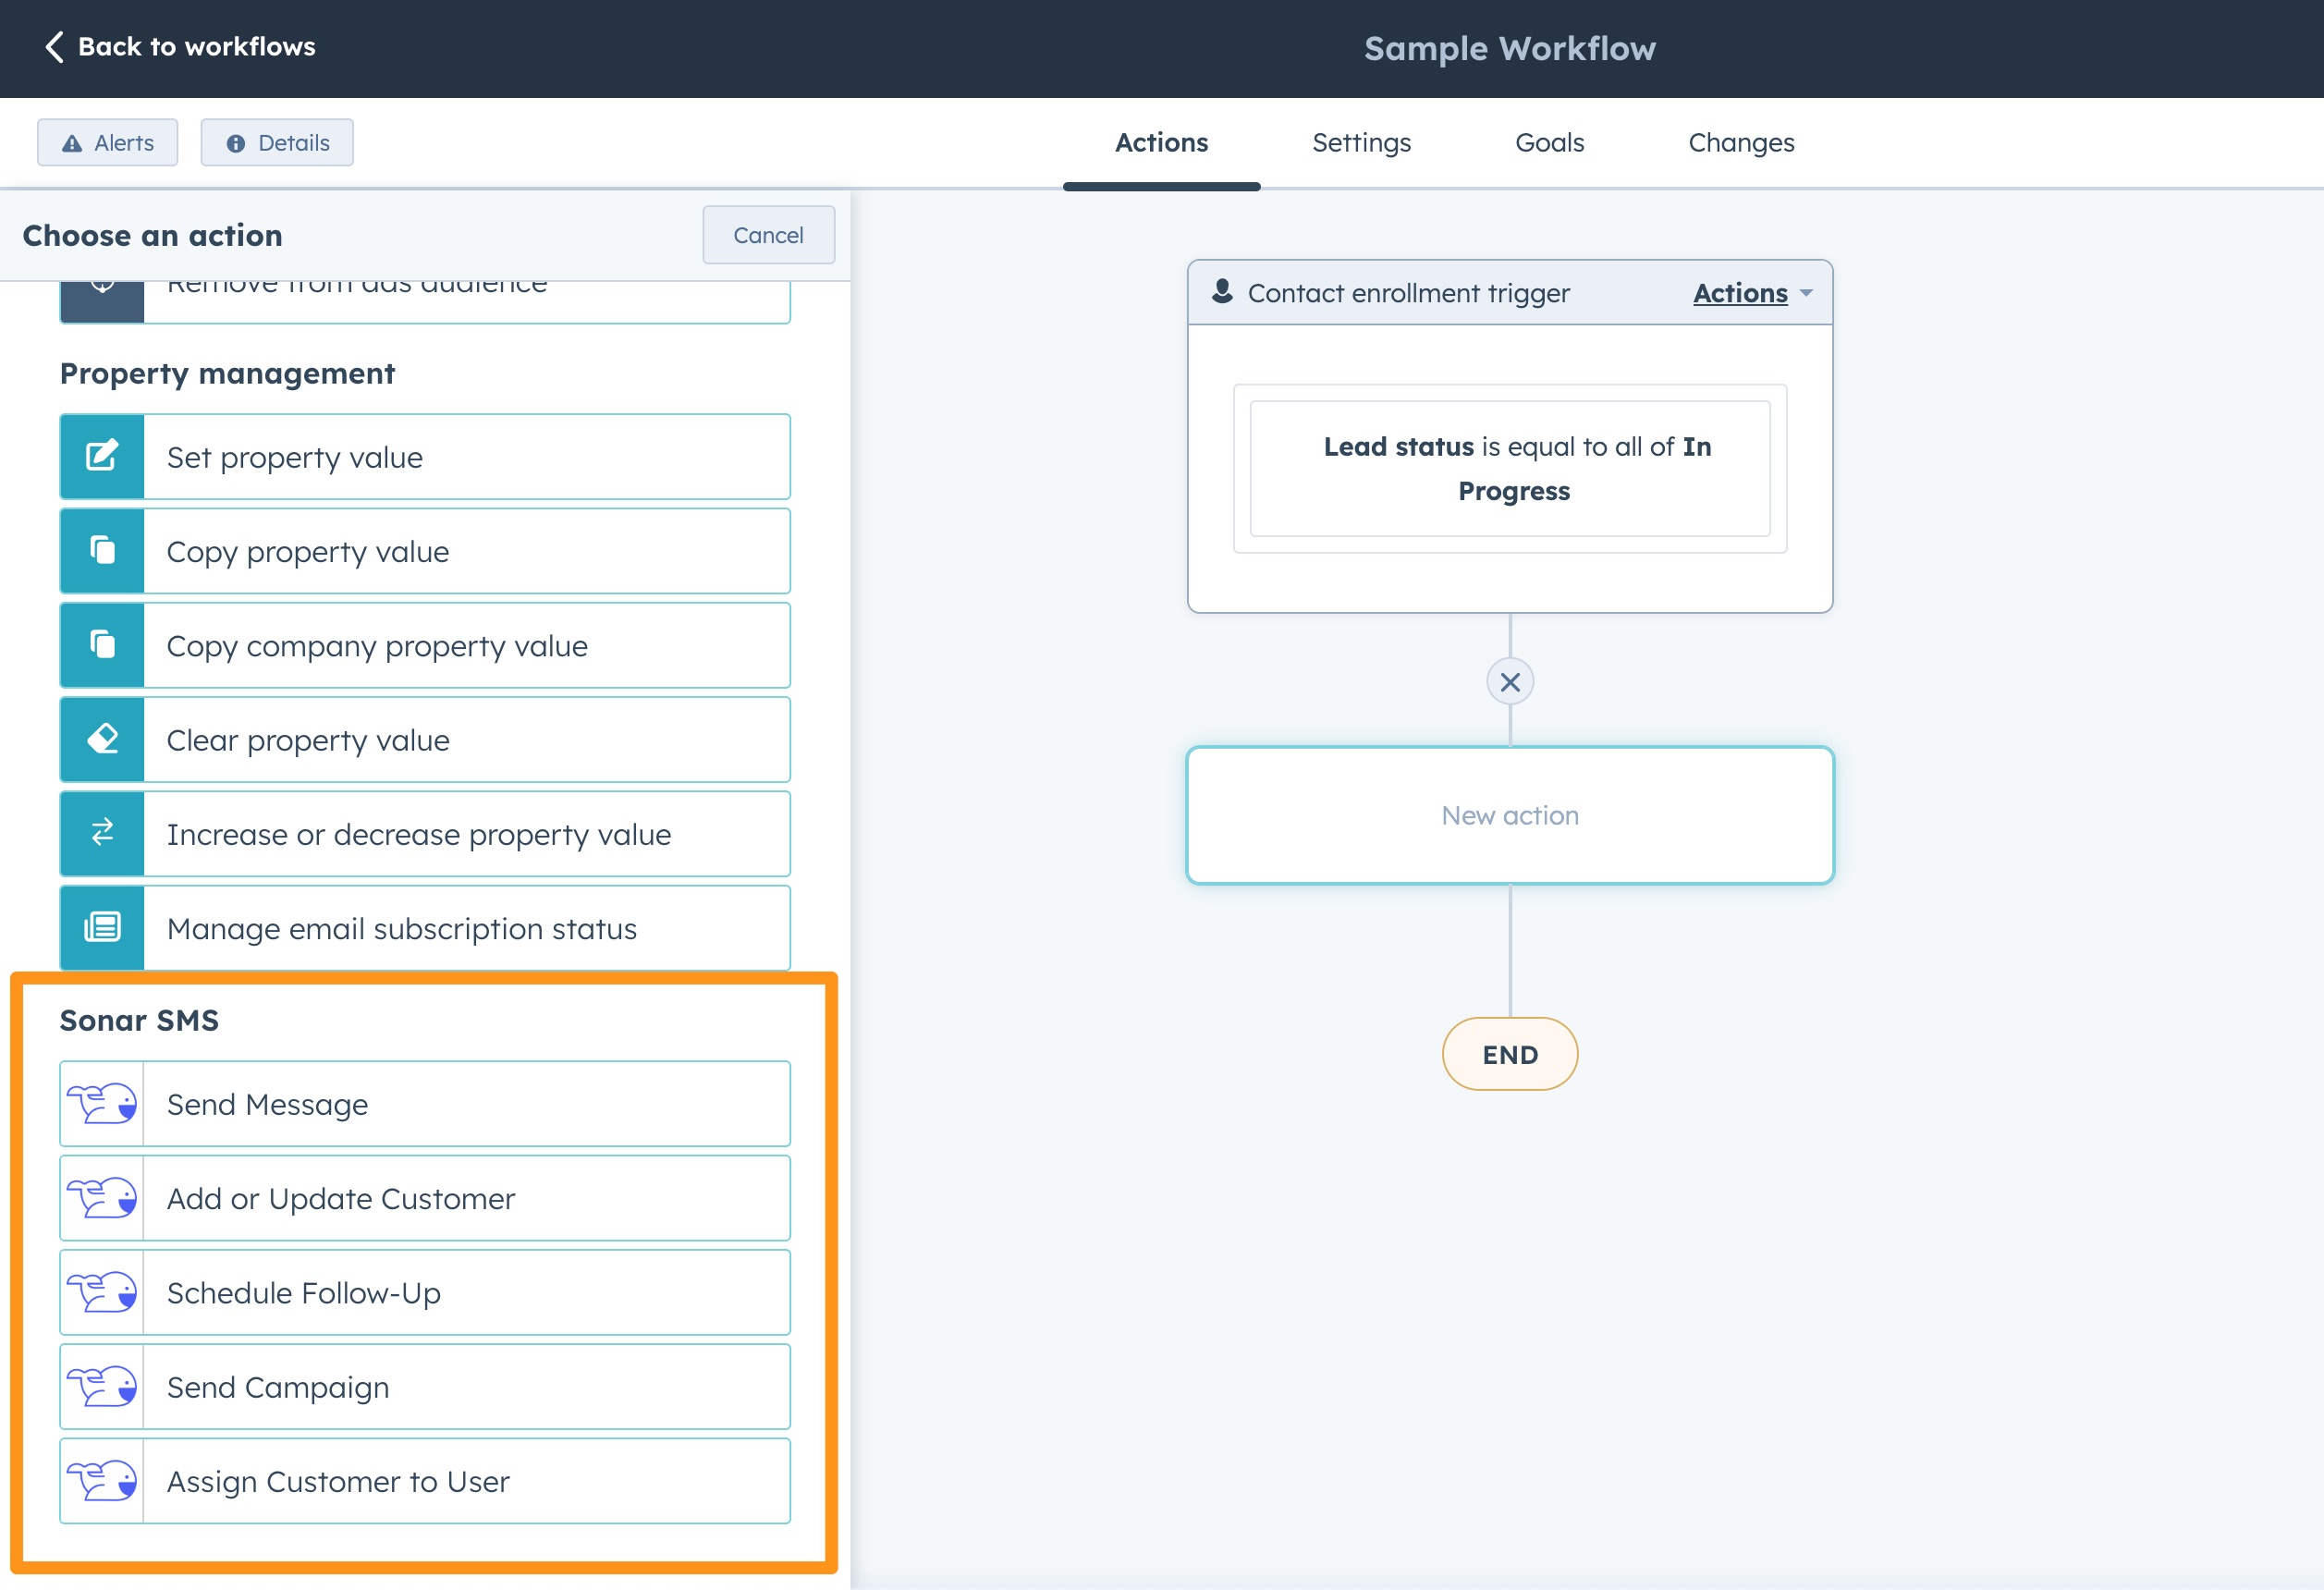
The Sonar Workflow actions can be found at the bottom of the list of available actions as seen in the screenshot below.
Each Sonar action has a few fields to configure. This screenshot shows the Send Message action as an example.
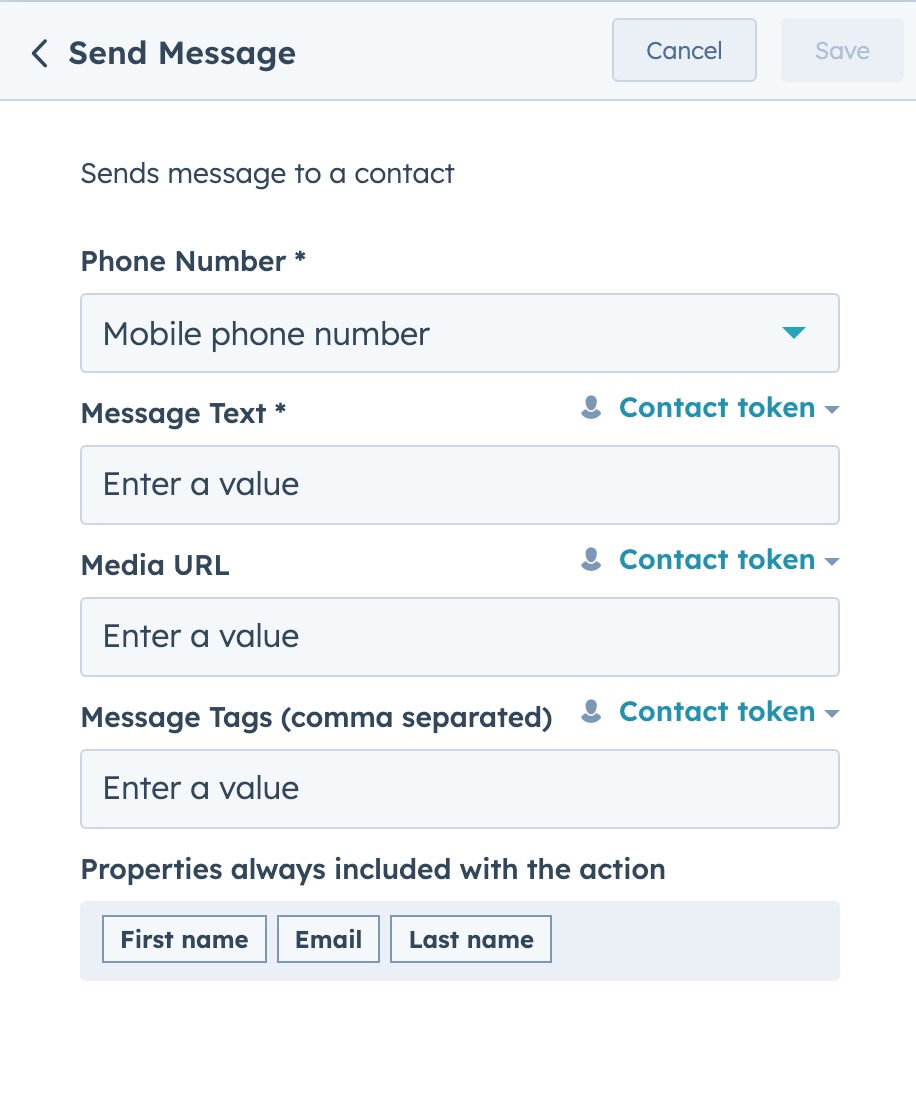
Some fields, like Phone Number, can be derived dynamically from the Contact that is enrolled in the Workflow. This allows Sonar to receive Contact-specific information from Hubspot.
Fields and tips by action type
The following sections will list the fields that must be configured for each Sonar Workflow action and provide a few useful tips.
Send Message
The Send Message action triggers an SMS/MMS message to be sent to a Contact.
Fields
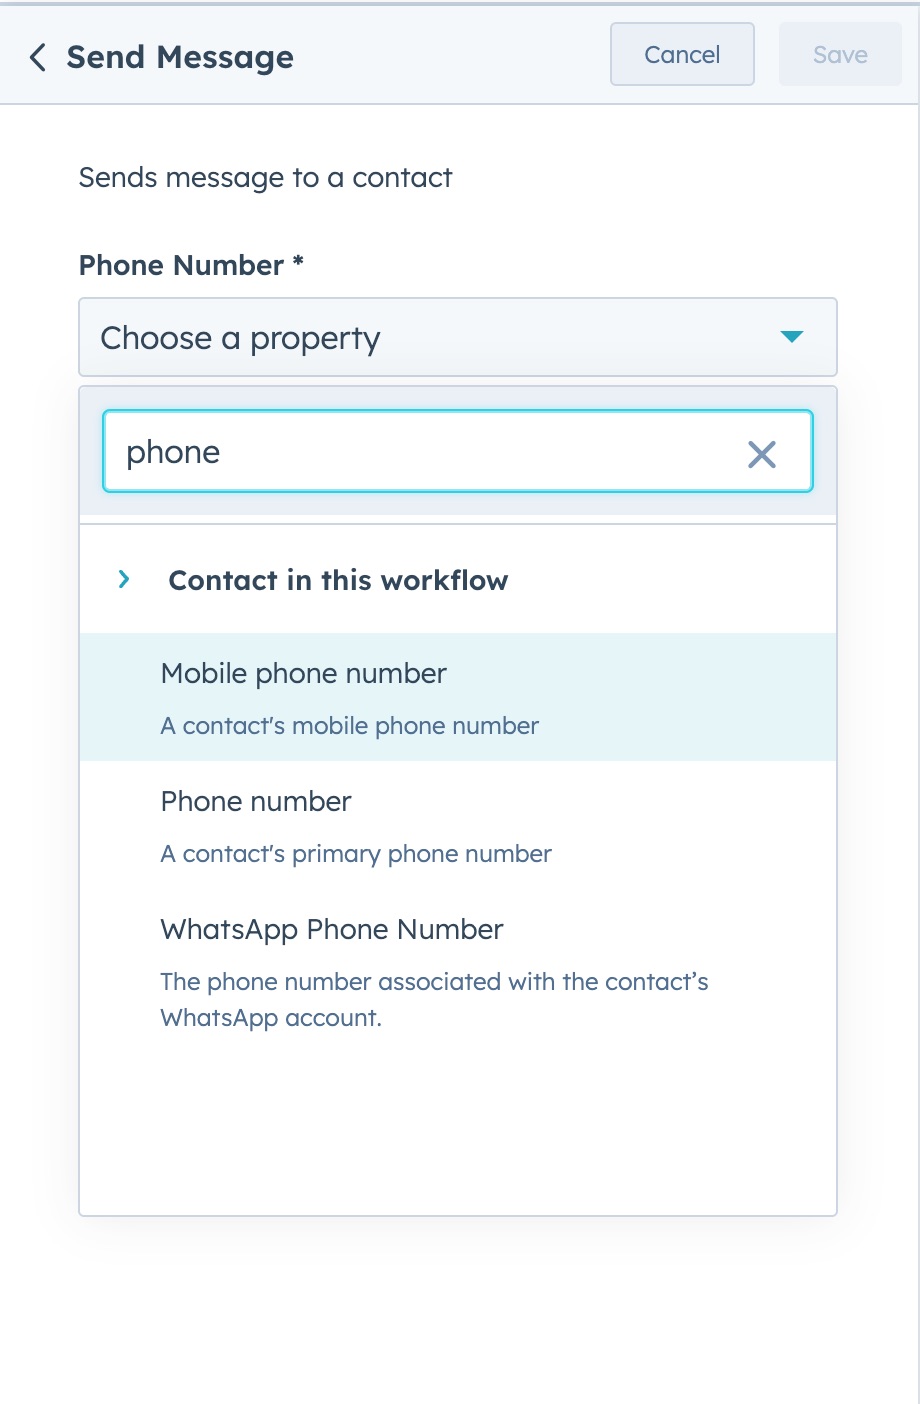
- Phone number (required): This is the phone number of the Contact who is enrolled in the Workflow and will be sent a message. Configuring the phone number field involves selecting the Contact property from which the phone number should be derived. We recommend choosing whichever phone number field is most likely to have a mobile phone number.
- Message text (required): This is the body of the SMS/MMS message. The field will accept plain text as input with a character limit of 65,536 characters. Remember, an SMS segment is 160 characters!
- Media URL (optional): This field allows you to attach an image or contact card (.vcf) to your message. This field requires a URL as input (a URL to the location of a hosted file). It cannot accept a file upload or attachment.
- Message tags (optional): This field allows you to add Tags to a message. Tags must be created in your Sonar account before the Workflow executes for the first time or the message will not be sent.
Send Campaign
The Send Campaign action triggers an SMS/MMS message to be sent to a Contact using Sonar Campaigns. Using Send Campaign instead of Send Message unlocks a few benefits of Campaigns:
- Editing message copy/attachments directly from Sonar without editing the Workflow.
- Testing and optimizing message copy/attachment performance
- Performance tracking (response rate, unsubscribe rate, link clickthrough rate)
- Assignment rules: assigning Contacts who respond to a specific user or team of users.
- Attaching a Follow-Up: configure your campaign to attach a Follow-Up immediately when the Campaign message is sent rather than as a separate action in your Workflow.
Fields
- Phone number (required): This is the phone number of the Contact who is enrolled in the Workflow and will be sent a message. This field is required. Configuring the phone number field involves selecting the Contact property from which the phone number should be derived.
- Campaign Slug (required): This is the ID of the Campaign that should be sent to the Contact enrolled in the Workflow.
You can find the slug of a Campaign from Step 1 of the Campaign editor. The screenshot below highlights a button that, when clicked, will copy the Campaign slug to your clipboard.
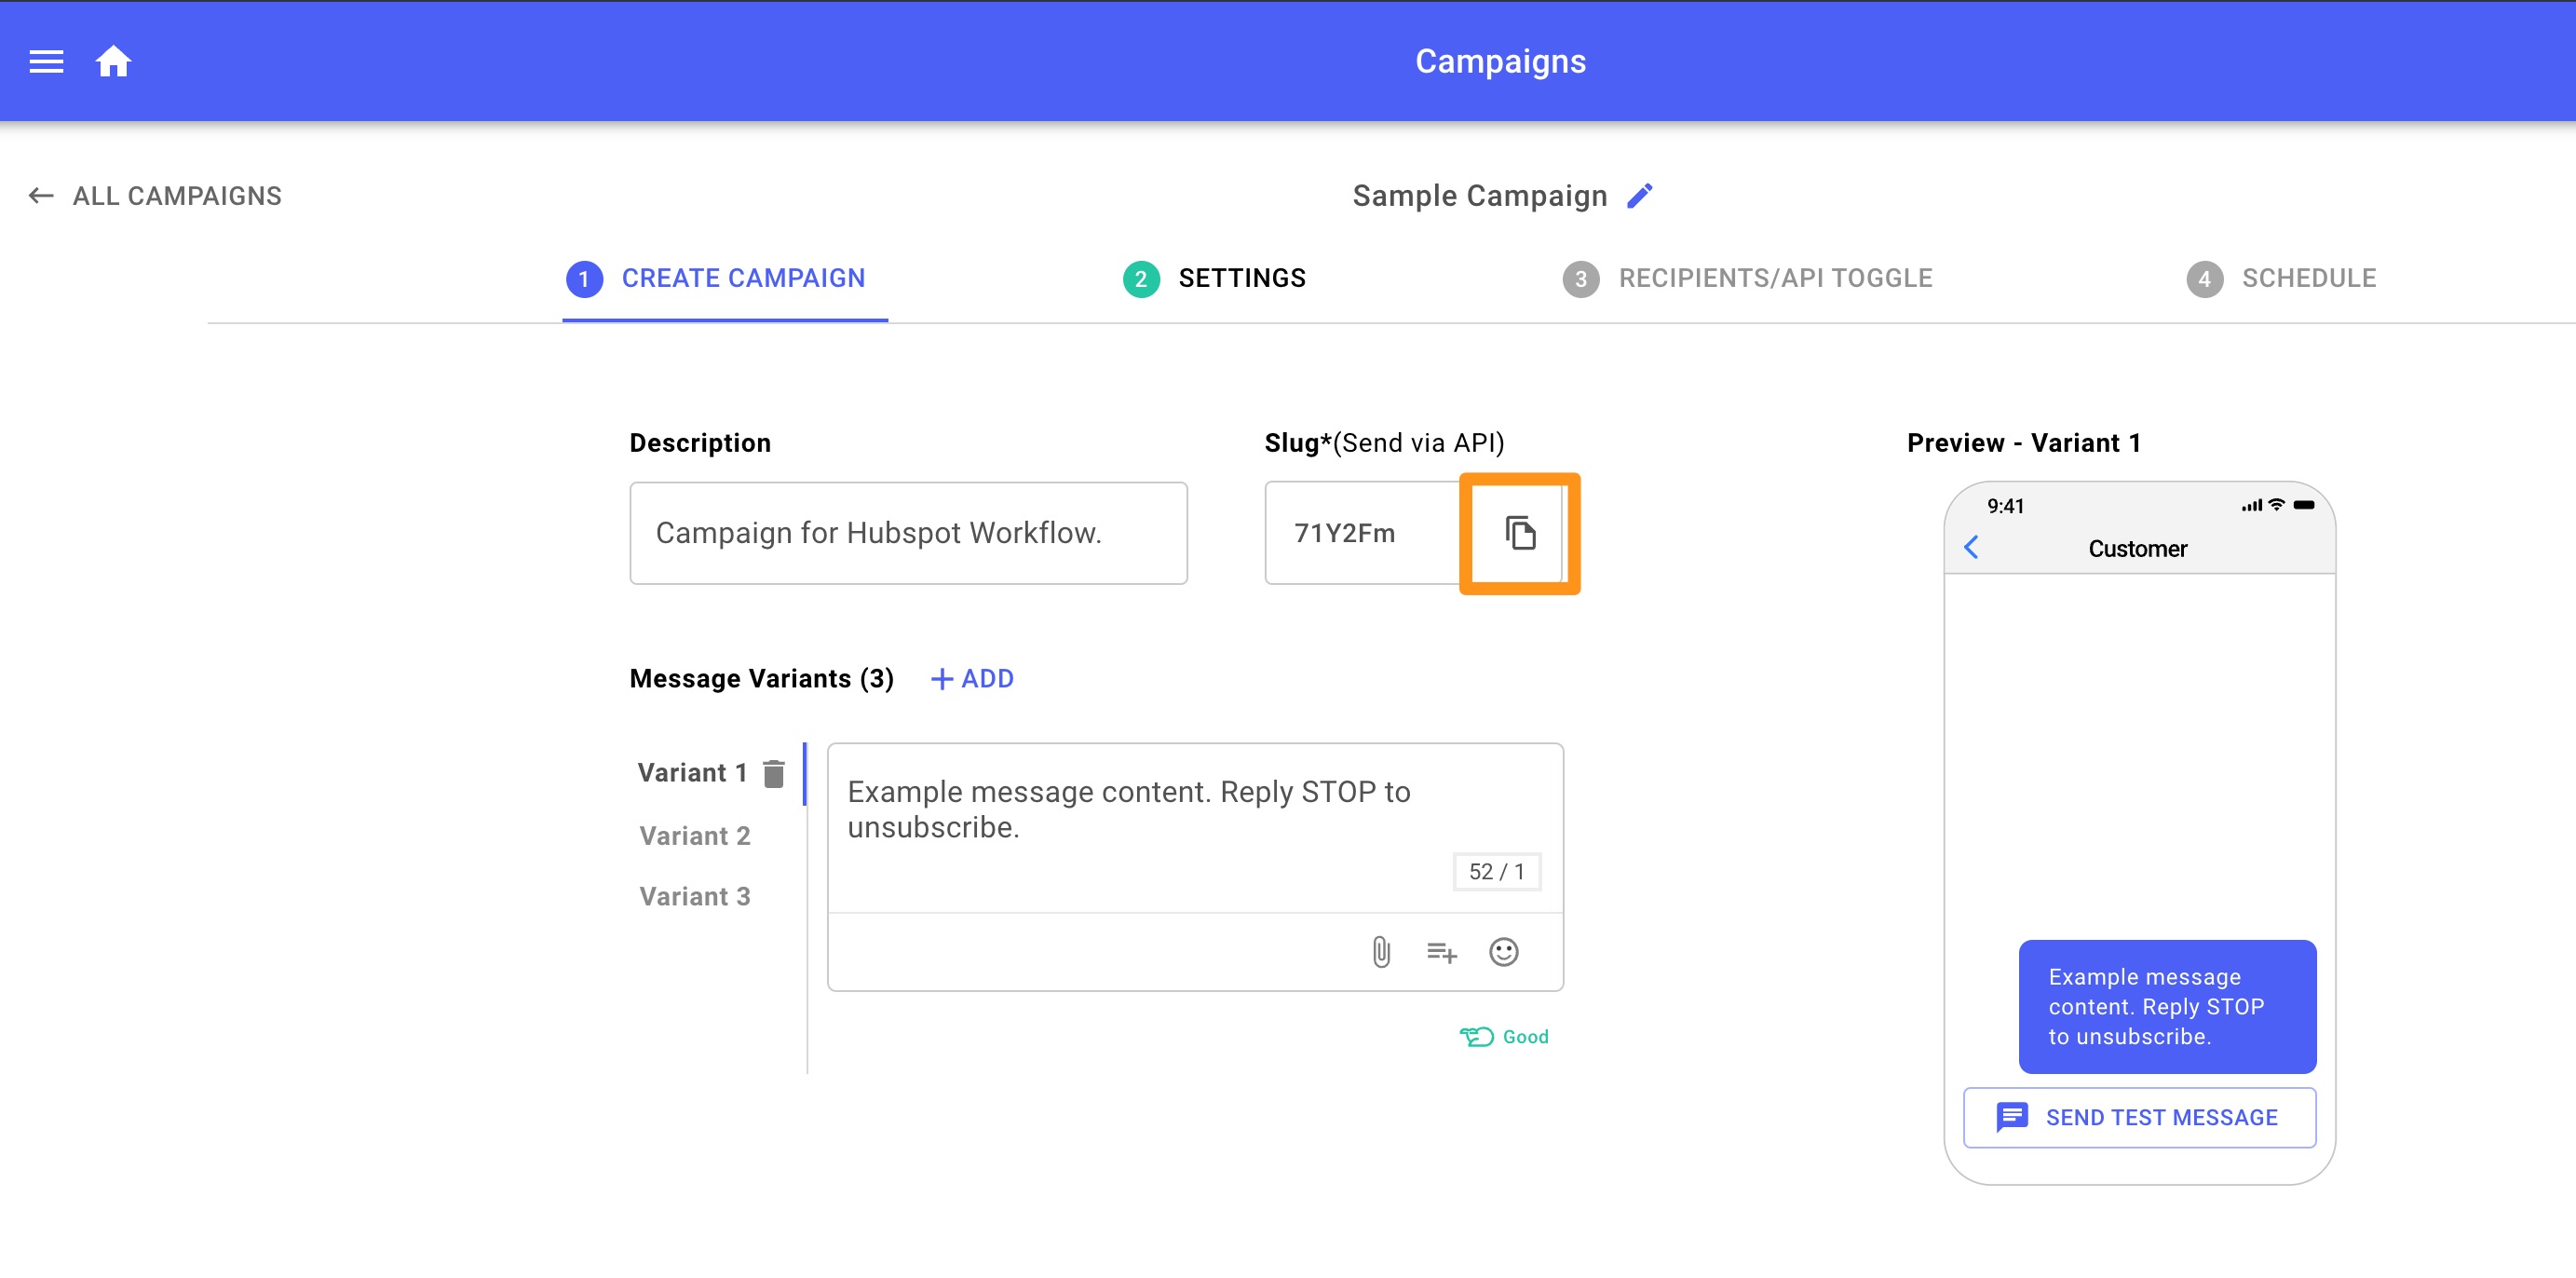
Note: You must use ONLY a six-character ID for the Campaign Slug field. The legacy Campaign editor will provide a slug that includes the Campaign name. For example: "Sample_Campaign_71Y2Fm". If you're still using the legacy Campaign editor, you'll need to copy only the six-character ID from the end of the slug; in this example "71Y2Fm".
Add or Update Customer
The Add/Update Customer action allows you to create or modify a Customer in Sonar. A Customer is an entity within Sonar that stores your Hubspot Contacts.
Fields
- Phone number (required): This is the phone number of the Contact who is enrolled in the Workflow and will be added or updated in Sonar. This field is required. Configuring the phone number field involves selecting the Contact property from which the phone number should be derived. We recommend choosing whichever phone number field is most likely to have a mobile phone number.
- First Name (optional): This is the first name of the Contact who is enrolled in the Workflow. This field accepts a Contact property as an input; meaning that the first name will be derived from the Contact enrolled in the workflow.
- Last name (optional): This is the last name of the Contact who is enrolled in the Workflow. This field accepts a Contact property as an input; meaning that the last name will be derived from the Contact enrolled in the workflow.
- Email (optional): This is the email address of the Contact who is enrolled in the Workflow. This field accepts a Contact property as an input; meaning that the email address will be derived from the Contact enrolled in the workflow.
- Zip code (optional): This is the postal code of the Contact who is enrolled in the Workflow. This field accepts a Contact property as an input; meaning that the zip code will be derived from the Contact enrolled in the workflow.
- Sonar accepts United States zip codes only for the Customer Zip Code property.
- Adding a zip code to your Sonar Customer records makes Intelligent Timezone Compliance more effective by providing a more accurate method of determining the timezone in which a Customer resides; compared to determining time zone based on the area code of the Customer's phone number.
- Subscribed (required): This field accepts a TRUE or FALSE value in the form of a checkbox. The subscribed field indicates whether the Contact enrolled in the workflow has consented or otherwise agreed to receive SMS/MMS messaging from your business. This field should be checked as TRUE unless the Workflow is intended to unsubscribe Sonar Customer records when a Contact unsubscribes (revokes their consent) from SMS/MMS messaging. Sonar automatically unsubscribes customers if a customer messages one of several common keywords or phrases.
- Timezone (optional): This is the timezone of the Contact who is enrolled in the Workflow. This field accepts a Contact property as an input; meaning that the timezone will be derived from the Contact enrolled in the workflow.
- This is the most accurate method of providing a timezone for your Sonar Customer records; maximizing the effectiveness of Intelligent Timezone Compliance.
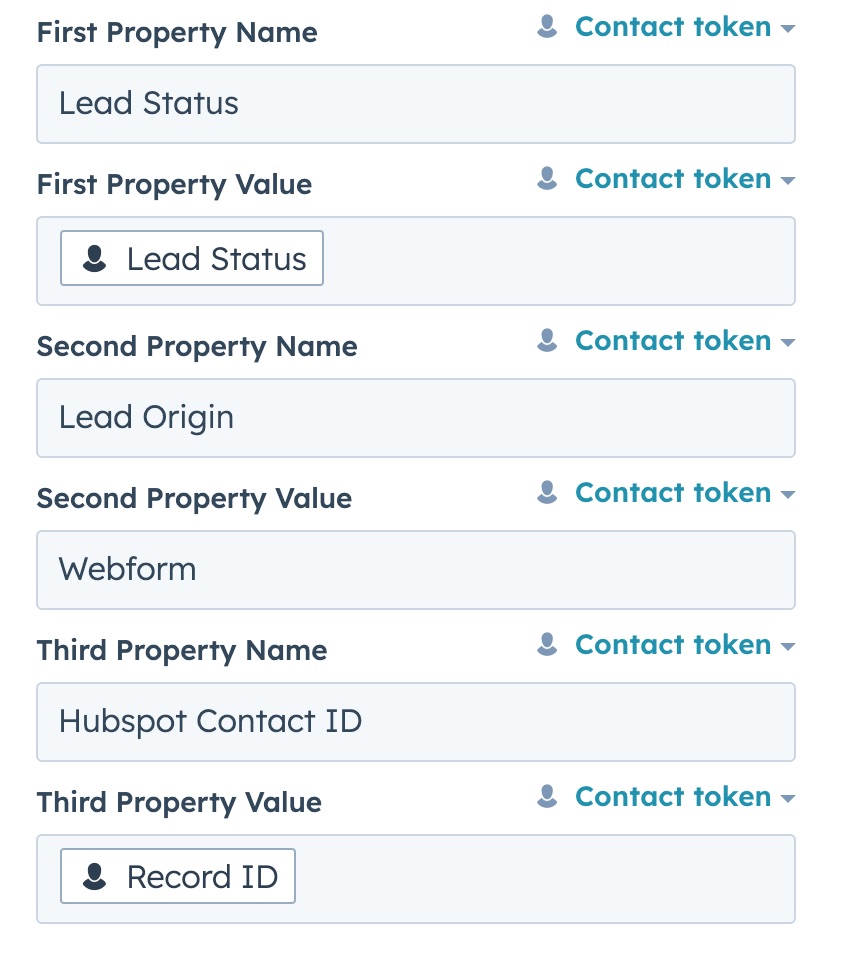
- Property name (optional) and property value (optional): Sonar Customer Properties are fields where you can capture information about your Customers. Customer Properties are key-value pairs. You can add up to three Customer Properties, as key-value pairs, from a Hubspot Workflow. For each Customer property, you should populate the property name AND property value fields in the Workflow action configuration menu. You can use Contact tokens to derive property values from the Contact record enrolled in the workflow OR enter static property values as text.
This screenshot shows an example of adding three Customer properties; two of which use Contact tokens:
- Lead Status = {lead status from Contact record}
- Lead Origin = "Webform"
- Hubspot Contact ID = {record ID of Contact}
One Sonar Customer per phone number
If two or more Contacts have the same phone number, Sonar will retain only one customer record (per Sonar account) with that phone number. The Sonar Customer retained will the the Hubspot Contact which was most recently enrolled in a Workflow.
Schedule Follow-Up
Sonar Follow-Ups are a way to automate a sequence of actions such as sending a message or assigning a Customer to a user. The Schedule Follow-Up action for Hubspot allows your Hubspot Workflow to automatically add a Contact to a Follow-Up Sequence.
Fields
- Phone number (required): This is the phone number of the Contact who is enrolled in the Workflow. This field is required. Configuring the phone number field involves selecting the Contact property from which the phone number should be derived.
- Follow-Up ID (required): This is the ID of the Follow-Up that should be scheduled for the Contact enrolled in the Workflow.
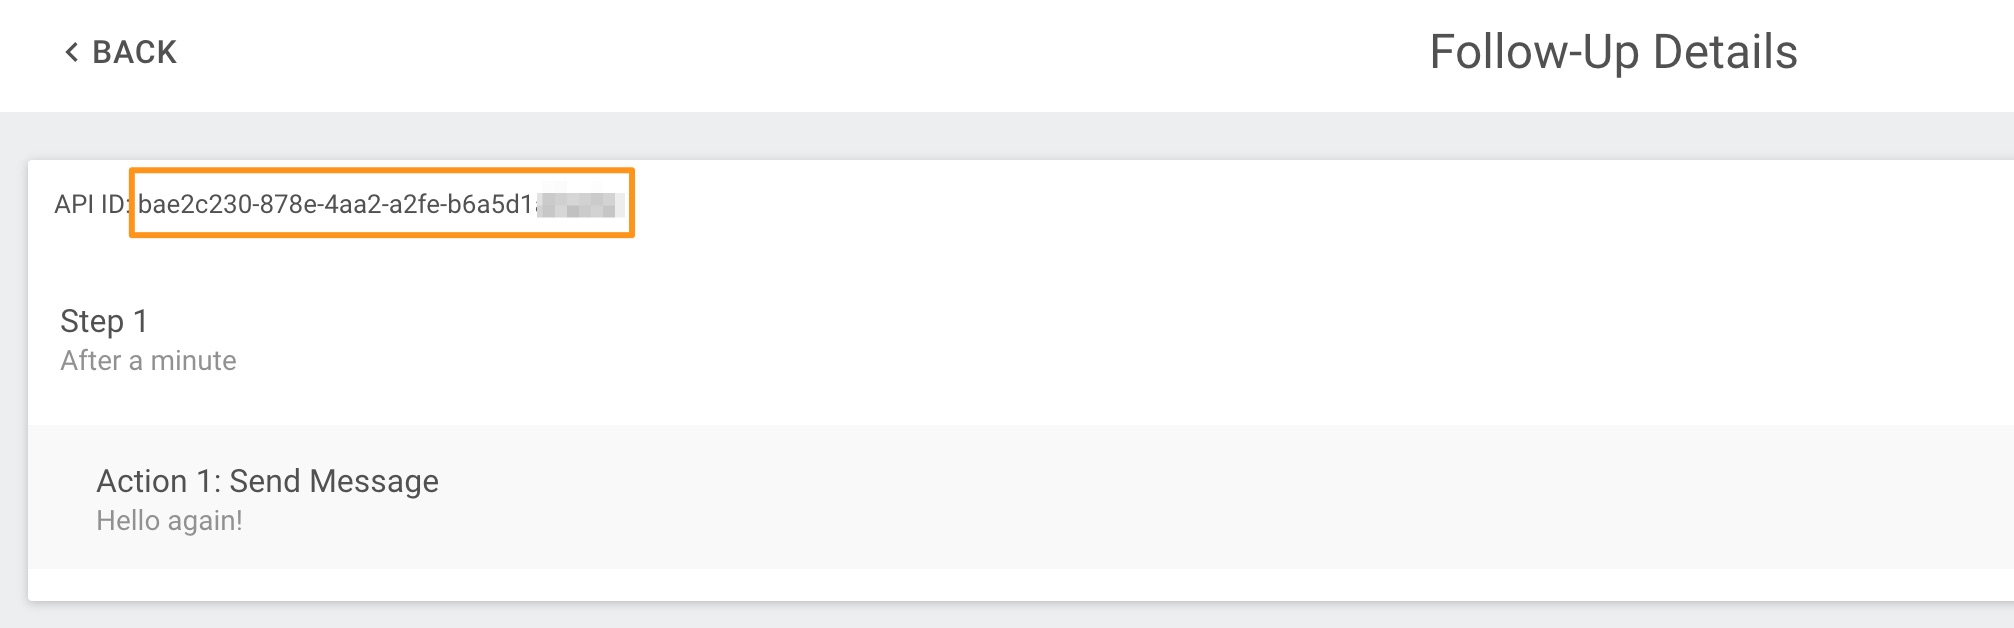
The Follow-Up ID is a 36-character alpha-numeric string that can include dashes. You can copy the ID of the Follow-Up you want to schedule from the Follow-Up details screen.
First, navigate to the Follow-Up manager page and identify the Follow-Up you want to add to your workflow. Then click on the "i" icon to view Follow-Up details.
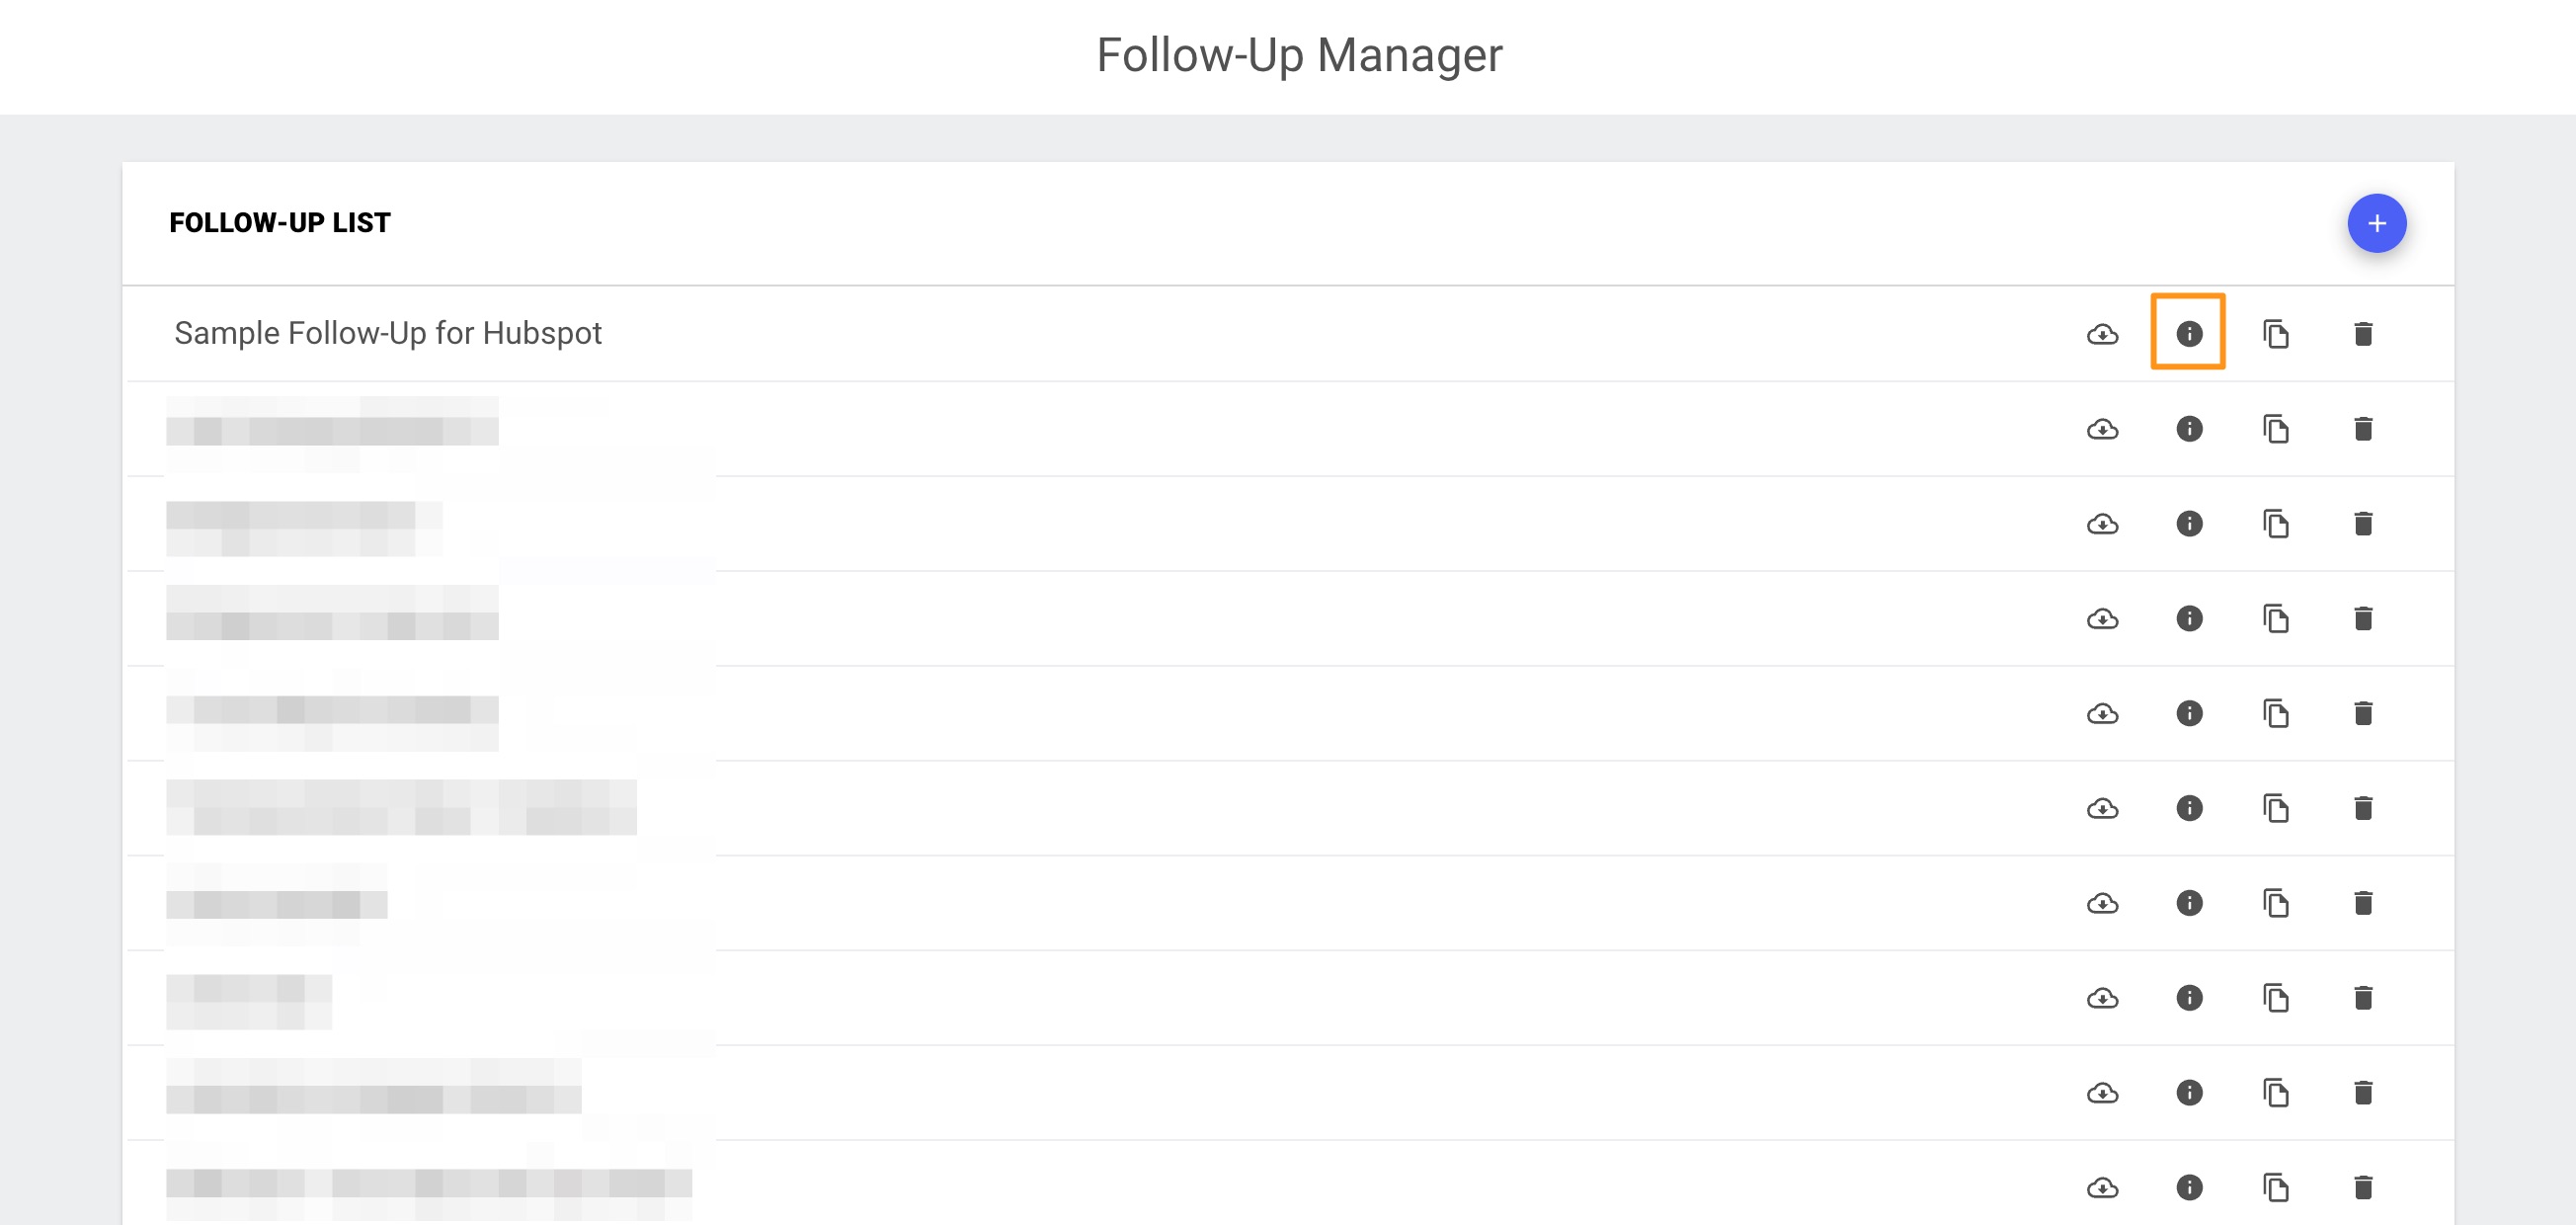
Find the ID next to "API ID" in the top left of the details screen.
Be careful when copy/pasting to avoid pasting extra characters, spaces, or returns.
Follow-Up timing
The time at which a Follow-Up is executed is determined by two inputs:
- The time at which the Follow-Up is scheduled
- The delay time specified in the first step of the Follow-Up. (Sonar Follow-Ups have delay timing built into each step)
Assign Customer to User
Assigning Contacts to team members can be an important step to ensure team members with the right role or skillset work with certain types of Contacts, workload is spread evenly across a team, or simply to ensure team members can get the right notifications and be responsive. The Assign Customer to User action is designed to assign the Sonar Customer to the same user who owns the Contact in Hubspot.
Fields
- Phone number (required): This is the phone number of the Contact who is enrolled in the Workflow. This field is required. Configuring the phone number field involves selecting the Contact property from which the phone number should be derived.
- Owner (required): This field tells Sonar which user to assign a Customer to.
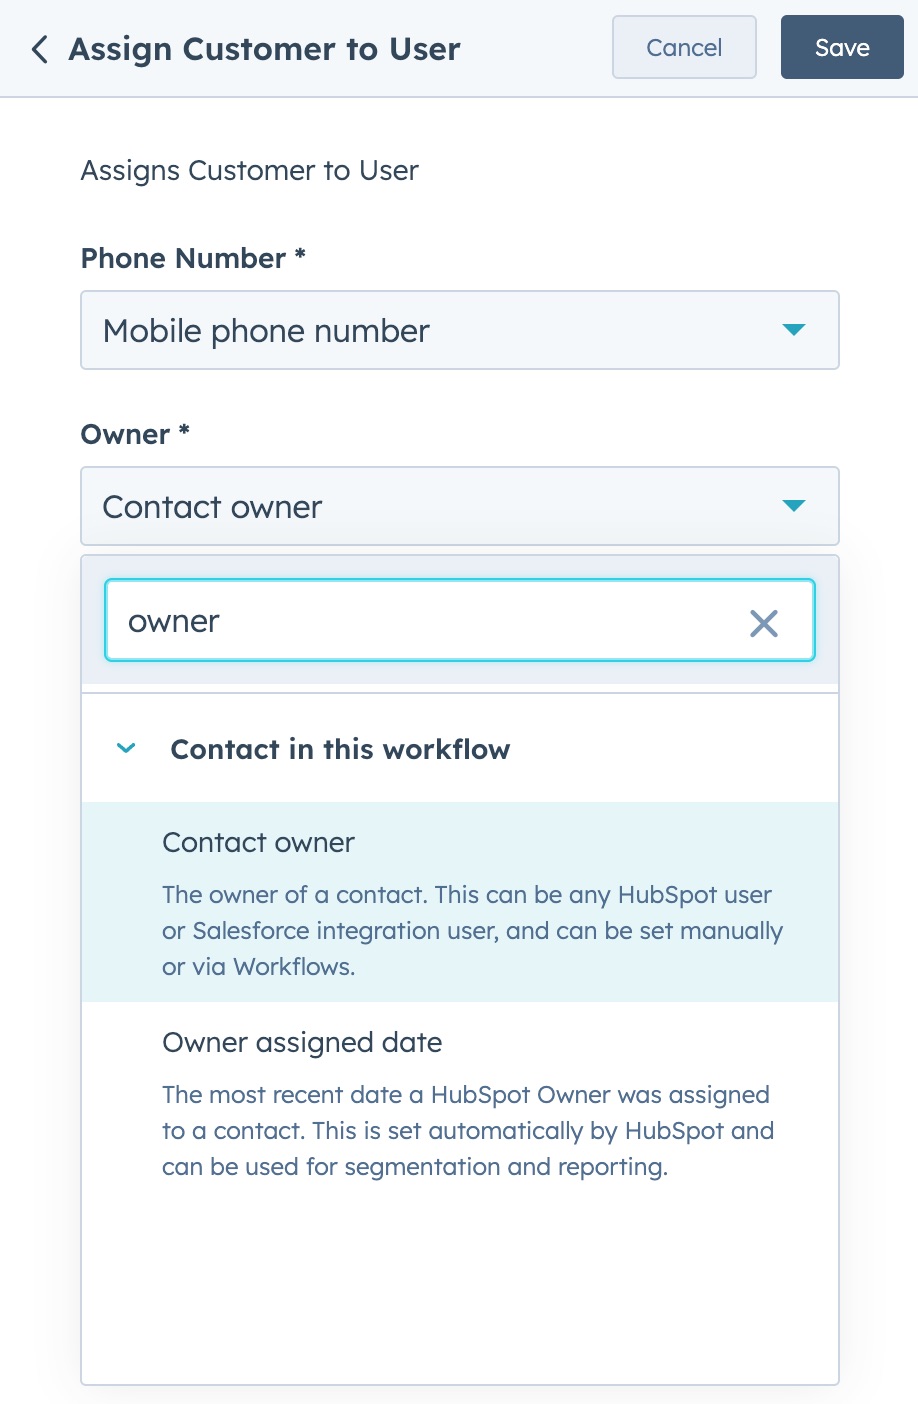
Hubspot users must also have a Sonar user profile which uses the same email address associated with their Hubspot user profile.
Updated 4 months ago